How to send User ID to Google Analytics 4?
Using unique identifiers for your users is the best way to segment and create audiences for remarketing on your website or app.
The use of user ID will be very useful for both in measuring activity across platforms, especially linking with BigQuery and the consent status of your users.
In this post, you will learn how to generate and send your user ID to Google Analytics 4, for creating user behavior reports.
Firstly, you should generate a unique user ID, for each visitor.
You can do this directly from Google Tag Manager.
There are multiple ways for you to assign unique user IDs to your users visiting your website. You can do this directly with your backend and database, or generate a basic user ID using Google Tag Manager.
Of course, Google Analytics Client IDs, aka ‘_cid’, can also be used as user IDs, but it would be better to combine them with your customers' IDs in CRM so that at some point you can combine this variable with your own remarketing data.
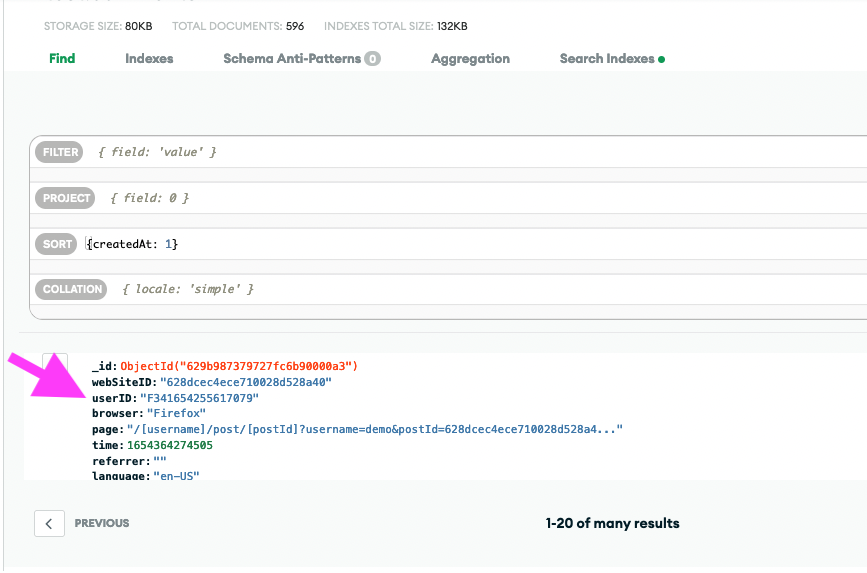
For example, on a website using a mongo DB database, you can see how user IDs are stored in this way. And with this data structure, you can sync user IDs with your CRM data.
And you can simply push to dataLayer this IDs like that:
dataLayer.push({
  'user_id': 'USER_ID',
  'crm_id': 'USER_ID'
});
However, you may not always change to play with your website's database.
So, let's continue to create the basic user ID on Google Tag Manager and send it to Google Analytics 4.
Generating User ID
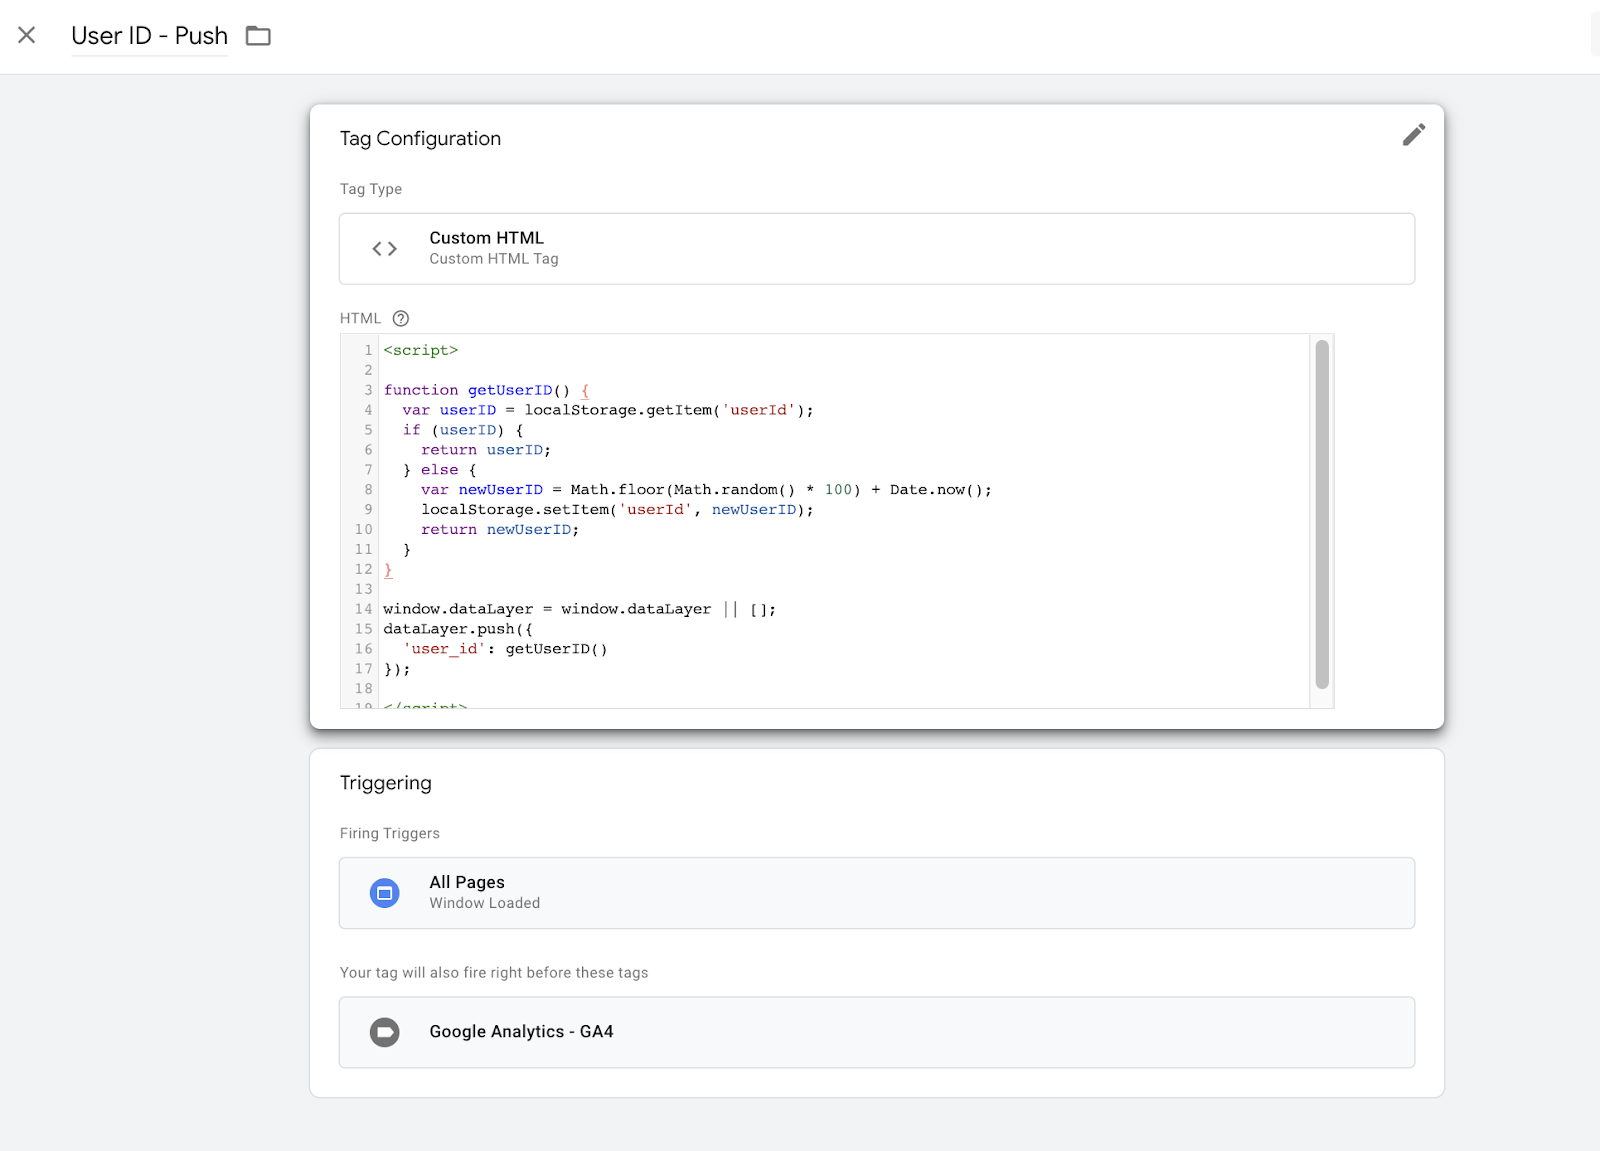
Create a new custom HTML tag and replace with this JavaScript.
function getUserID() {
  var userID = localStorage.getItem('userId');
  if (userID) {
    return userID;
  } else {
    var newUserID = Math.floor(Math.random() * 100) + Date.now();
    localStorage.setItem('userId', newUserID);
    return newUserID;
  }
}
This script will create a random user ID and save it to the directly browser's local storage.
You can find more details about window.localStorage here.
Note that, if you have a user ID from the database (backend), you can use it directly. This method is an example of how you can send your user ID to Google Analytics 4. If you generate and keep your user ID in local storage, the user can delete or modify it.
Also, you can use the built-in variable called Random Number on Google Tag Managers. But you may want to add some variables generating user ID like date or specific characters.
Then, you should push getUserID variable to dataLayer.
window.dataLayer = window.dataLayer || [];
dataLayer.push({
  'user_id': getUserID()
});
Add an All pages trigger and save it. Your final tag should be like that.
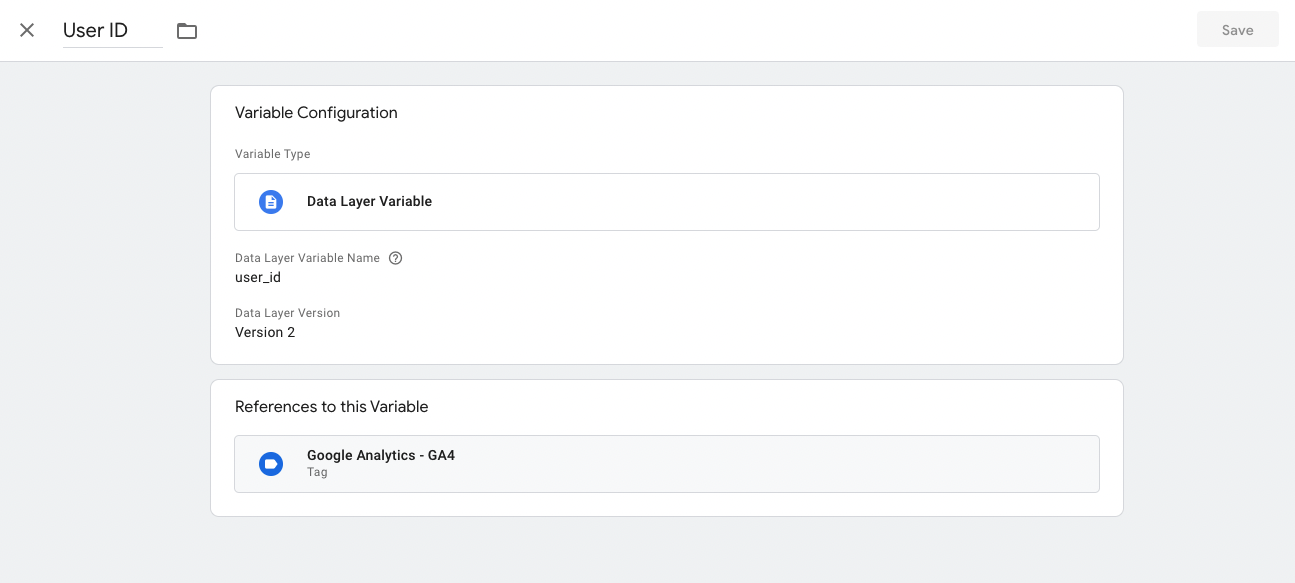
Create Variable for User ID
Create a new variable called User ID, and refer to user_id variable from data layer.
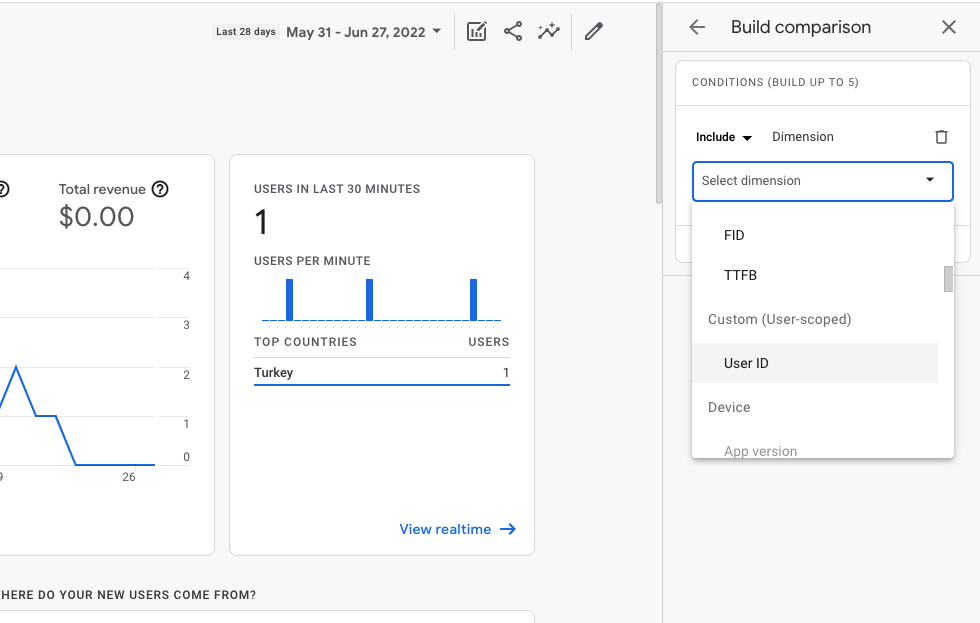
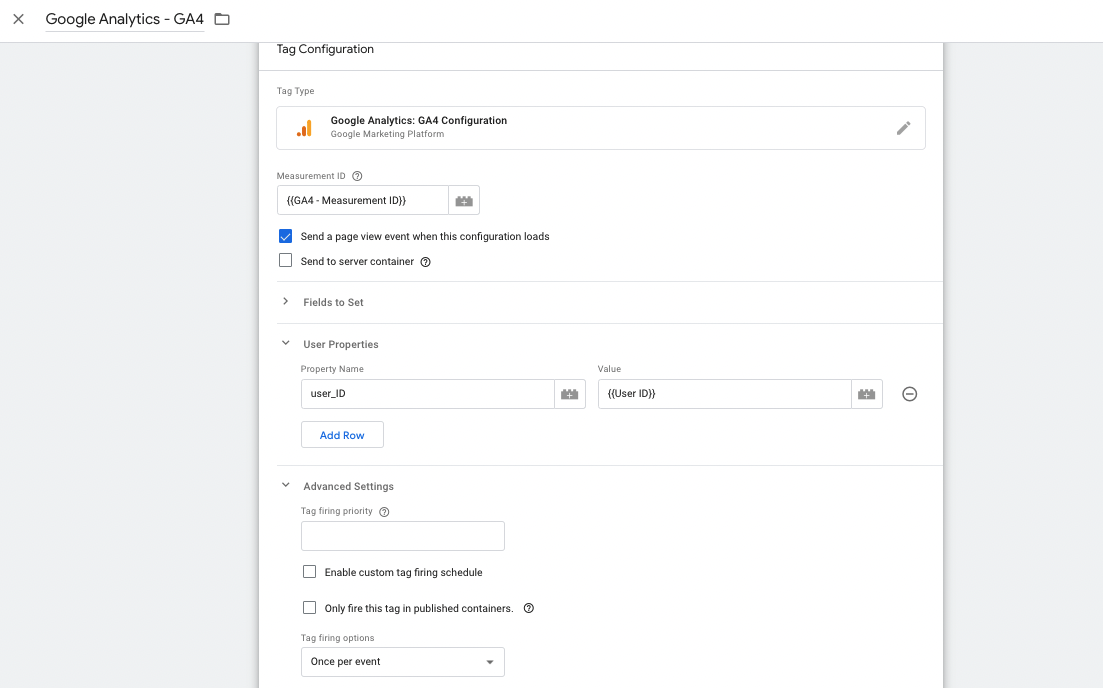
Add User Property to GA4 Configuration
To send User ID variable to Google Analytics 4, you should add this {{User ID}} variable to User Properties.
Note that, if you add a field directly, you can not set a custom definition in Google Analytics 4 UI.
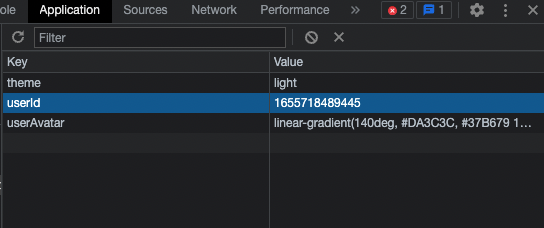
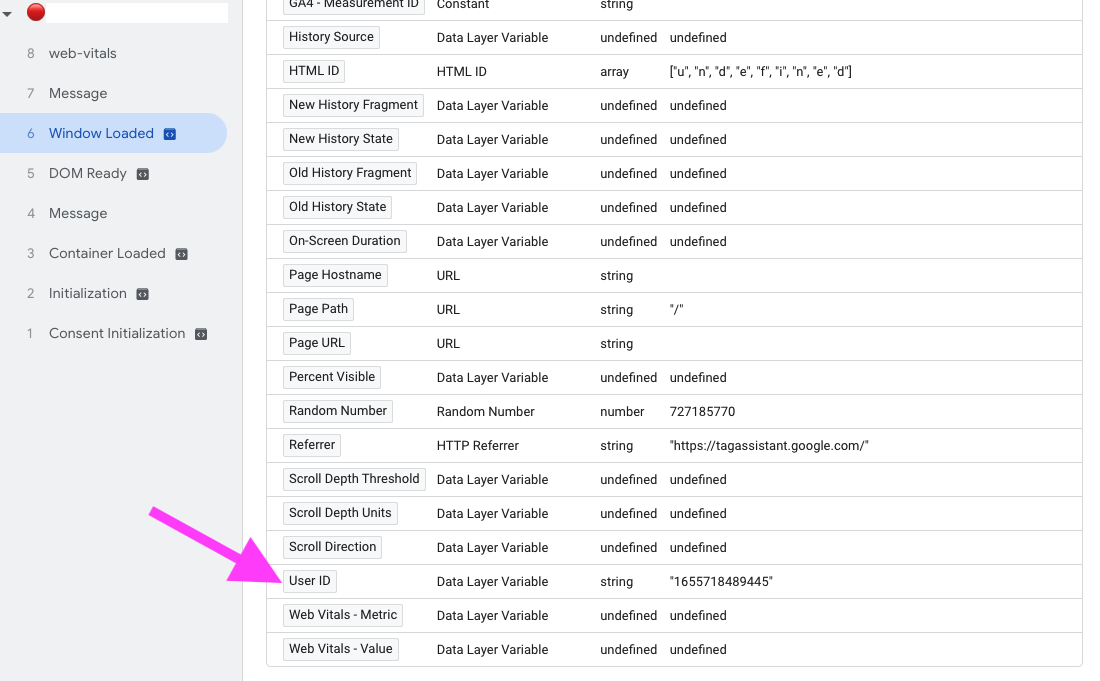
Save this tag and click on Preview for testing our script. You should see the User ID on Window Loaded.
Add Custom Definitions in Google Analytics 4 UI
Let's create custom definitions for that User ID variable.
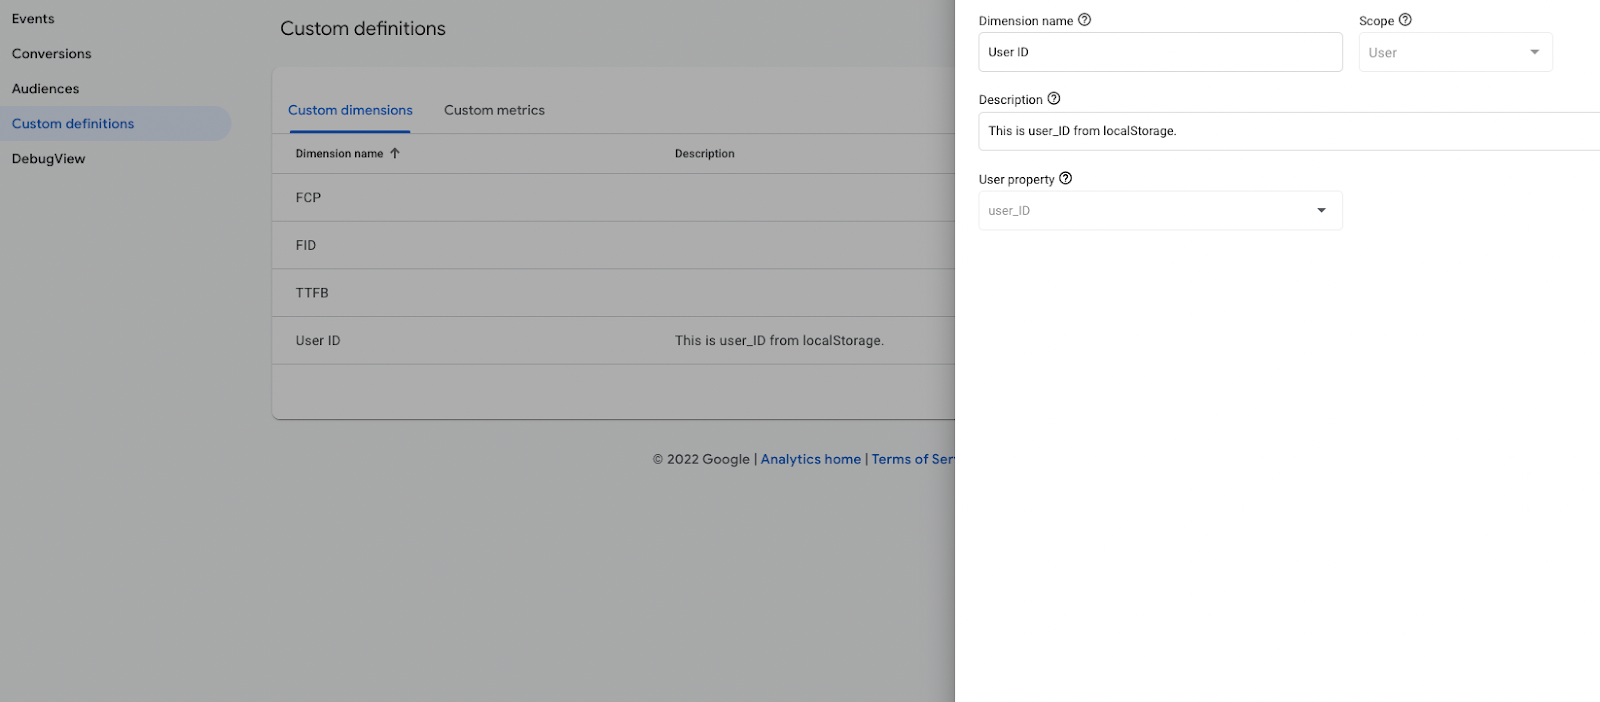
Go to your GA4 account, and click Configure > Custom definitions on the left sidebar.
Click to Create custom dimensions and add user ID definition.
Scope should be User, and user property should be user_ID, which is configured before on GTM.
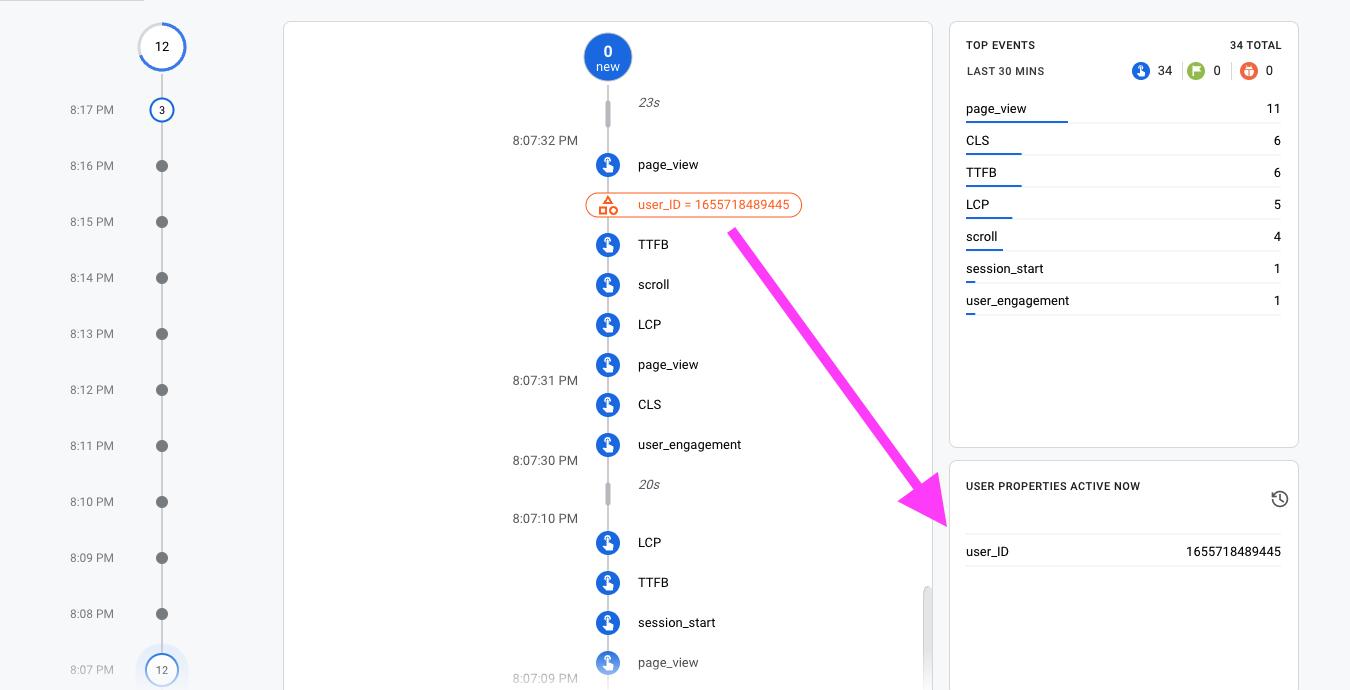
Save it and go to DebugView for testing.
Visit your website and check your User ID definitions in real-time.
Congrats, now you can use this custom User-scoped definition on your report and analysis.