How to Setup Google Analytics 4 (GA4)?
In October 2020, Google announced that the current Universal Analytics (UA) tool will completely stop processing data as of July 1, 2023. I would like to point out that this date is July 1, 2024 for Universal Analytics 360 users. With the Universal Analytics tool completely out of our lives, Google Analytics 4 (GA4), a new and much more powerful tool in the field of measurement, will be introduced. This article will only help you with the basic setup of Google Analytics 4 so that you can continue measuring when Universal Analytics stops processing data on July 1, 2023. If you already have customized metrics such as goals, events, e-commerce activities, etc. that you already track within Universal Analytics, you will need to make a more advanced migration.
How to Create Google Analytics 4 Properties?
First, we go to our existing Google Analytics account. Our currently running Universal Analytics property can continue to work as it is and stay with us until the deadline above. It would be best if GA4 and UA work together.
Step 1: After logging into your Google account, click on the link below:
https://analytics.google.com/analytics/
If you do not already have a Universal Analytics tool, you will see a page like the one below.
Step 2: Click on the "Start measuring" button.

If you already have a Universal Analytics account, you should proceed from the account as I have marked in red below. Or you can also click on "GA4 Setup Assistant" but I will show you how to create a property manually.
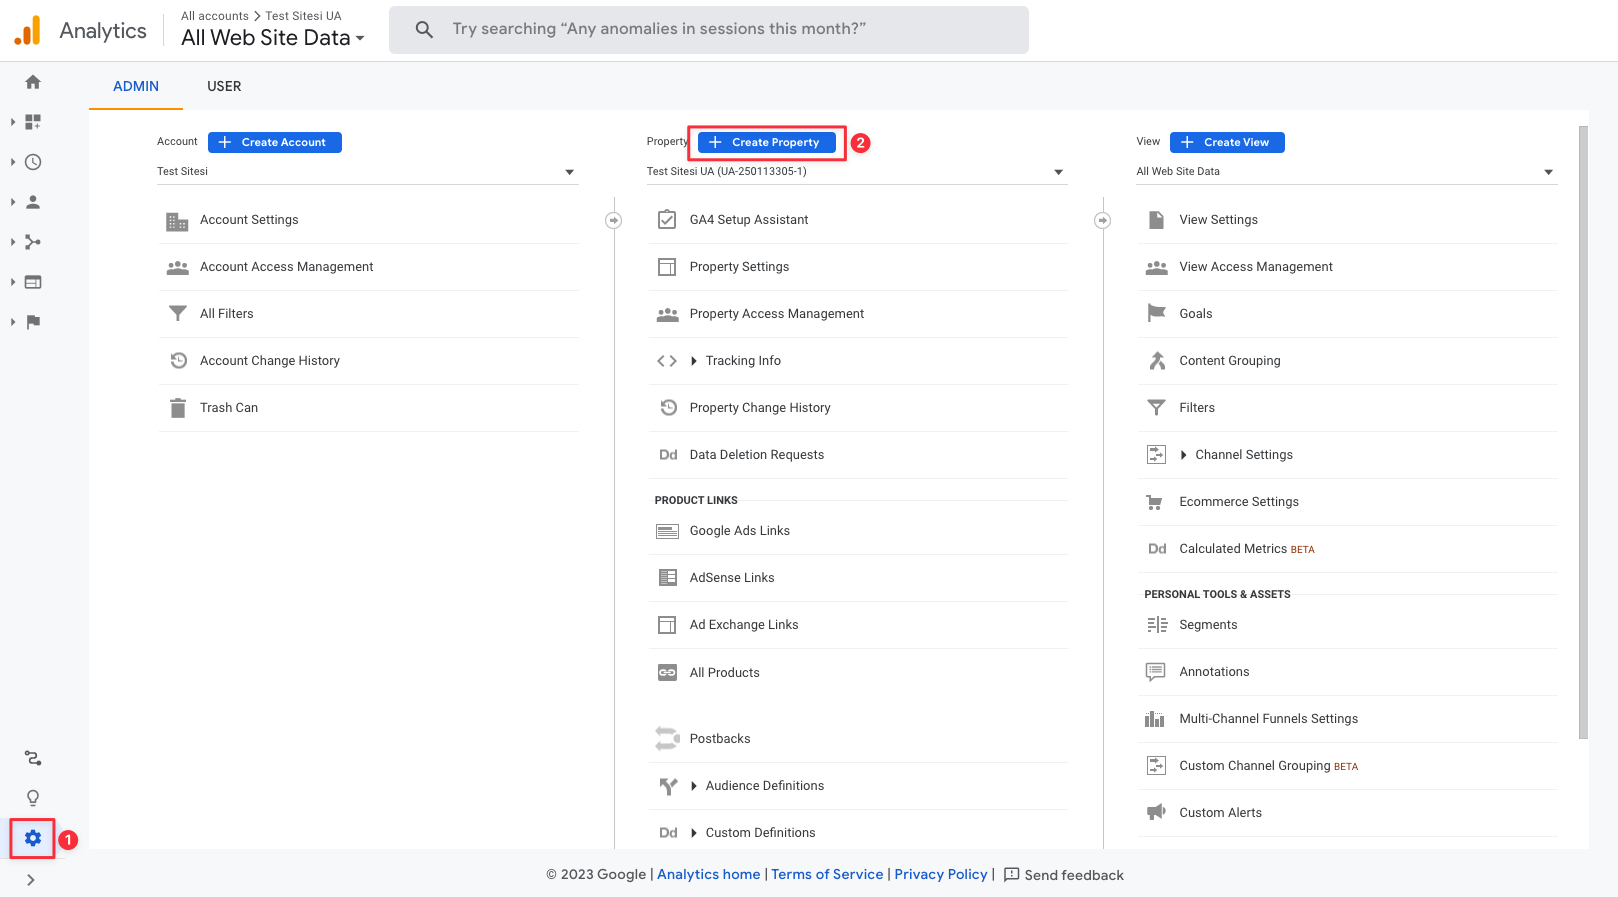
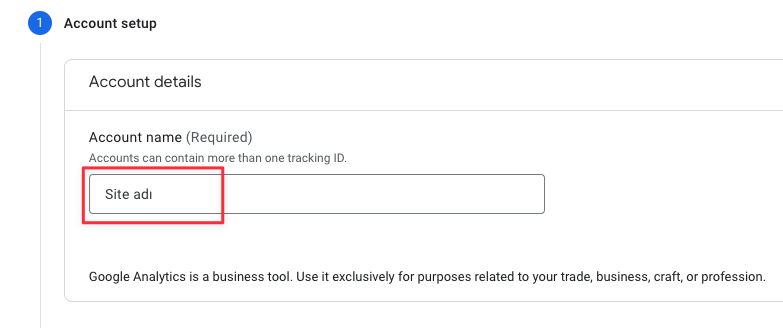
Step 3: If you clicked "Start measuring", you need to create an account first. You can type your site or brand name, leave the boxes below as they are and click "Next".
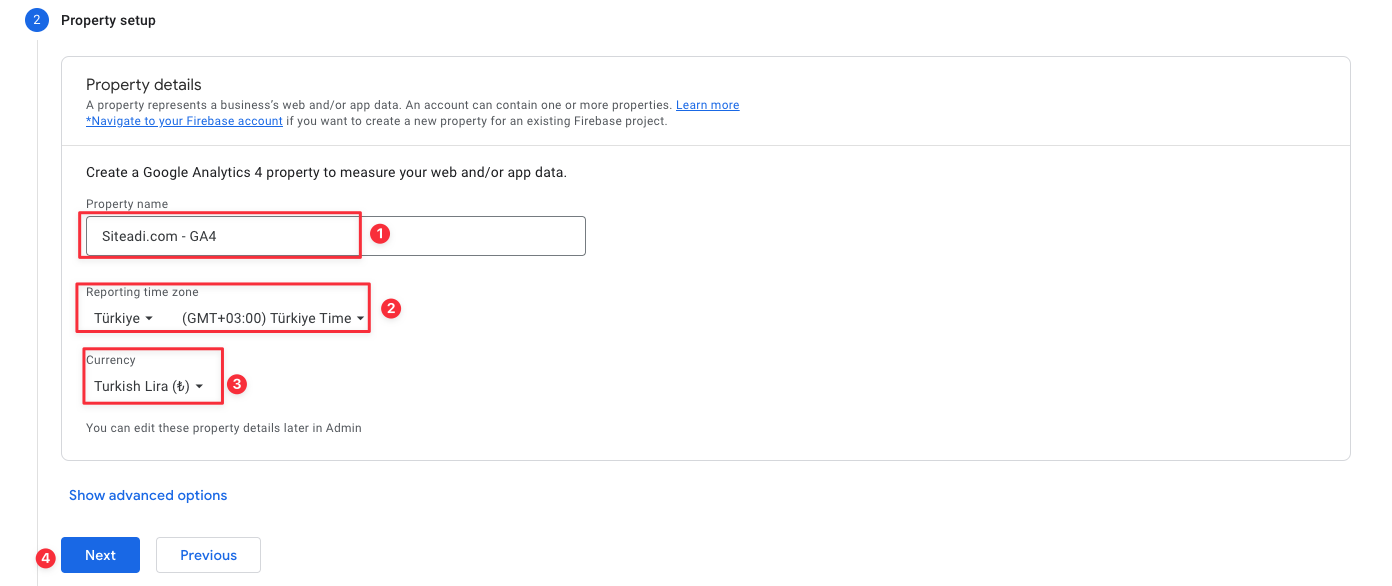
Step 4: In the Property setup section, you should fill in the following fields according to your site and location. If you have an existing Universal Analytics account, you will start directly from this step without seeing "Step 2" and "Step 3".
Step 5: In the "Business information" stage, you should make the appropriate choices for your sector and business. The choices here do not directly affect the operation of the GA4 tool. So you don't need to think too much while making the choices here.
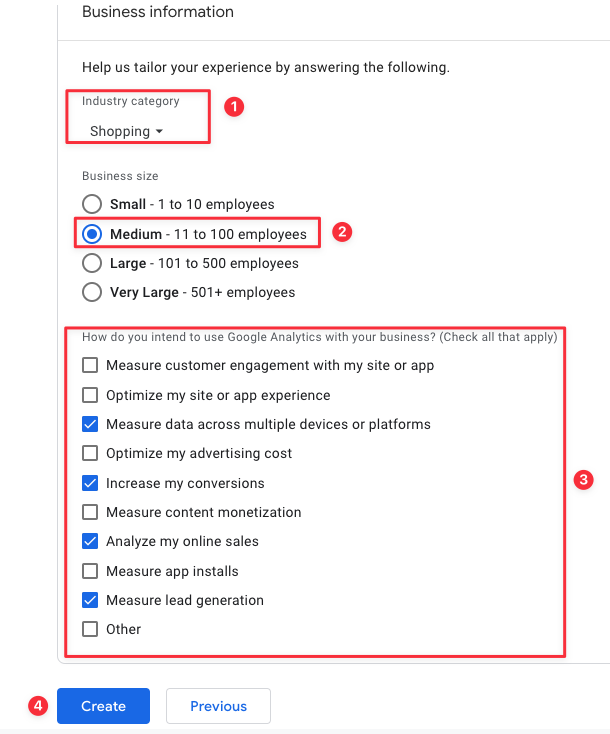
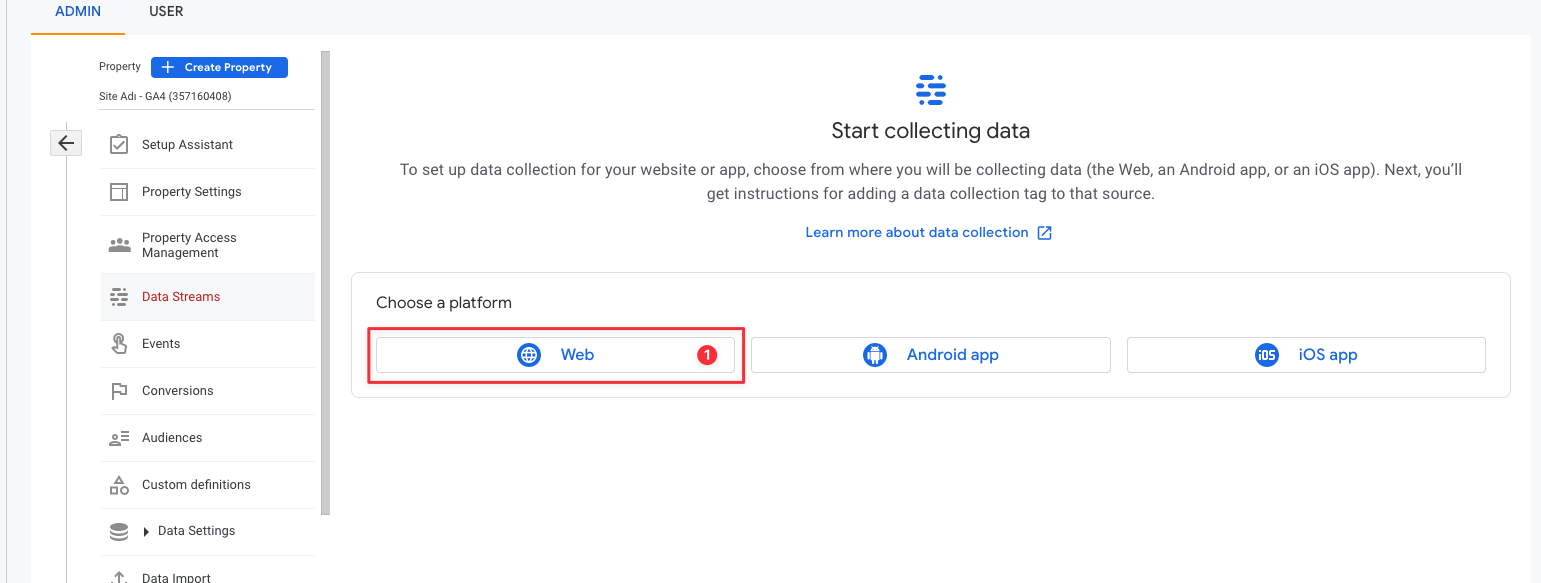
Step 6: When we click "Create" in the step above, our property will now be created and we will see "Data streams". Let's choose "Web" here. If you have an Android or iOS app, you can then install it in the same property. Firebase integration under the same account is one of the new features GA4 provides us. Since app installations proceed differently and the common one is web installation, we will continue on the web in this article.
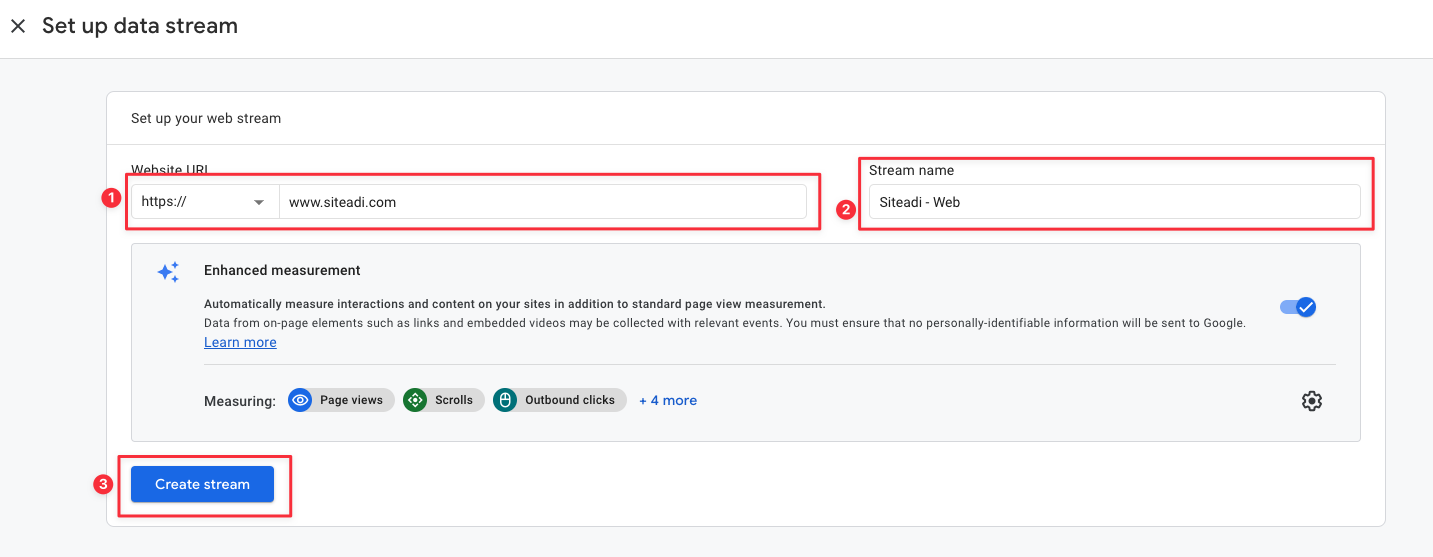
Step 7: On the screen that appears after web selection, you can fill in the following fields according to your site. After saying "Create stream", your Google Analytics 4 property will now be created.
How to Integrate Google Analytics 4 into Your Site?
We have set up our GA4 property, but the property we have set up is currently empty and not integrated with any site. The next steps will be about integrating it into our site and activating the tool. There are multiple methods to integrate Google Analytics 4 into the site. I will show you the 2 most used methods, manual and Google Tag Manager (GTM). If you have a GTM account, I can recommend integrating via GTM instead of manually.
Integration Manually
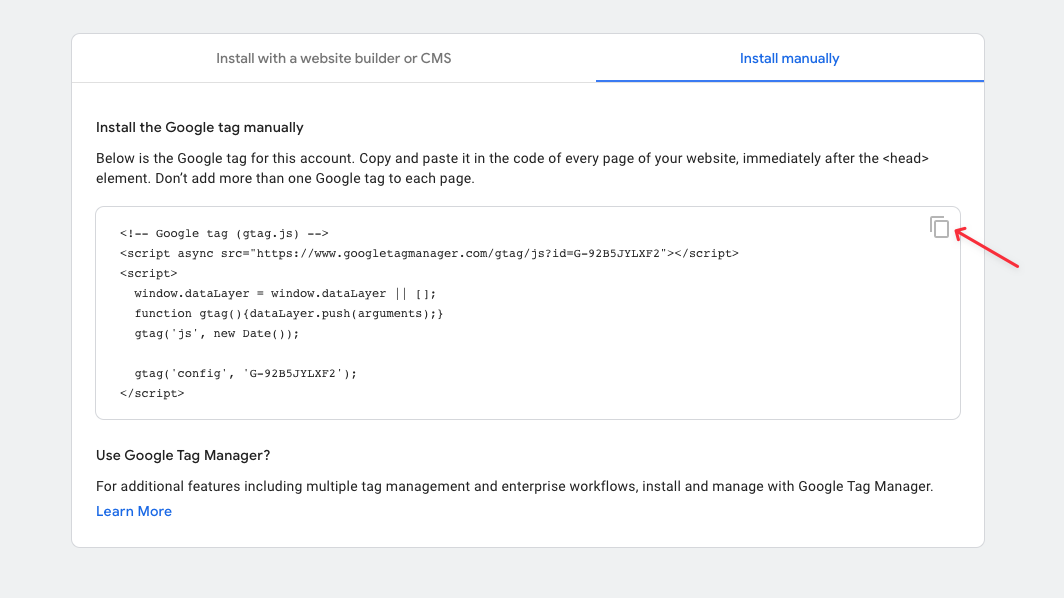
Step 1: After creating the property, click "Install manually" on the screen that appears.
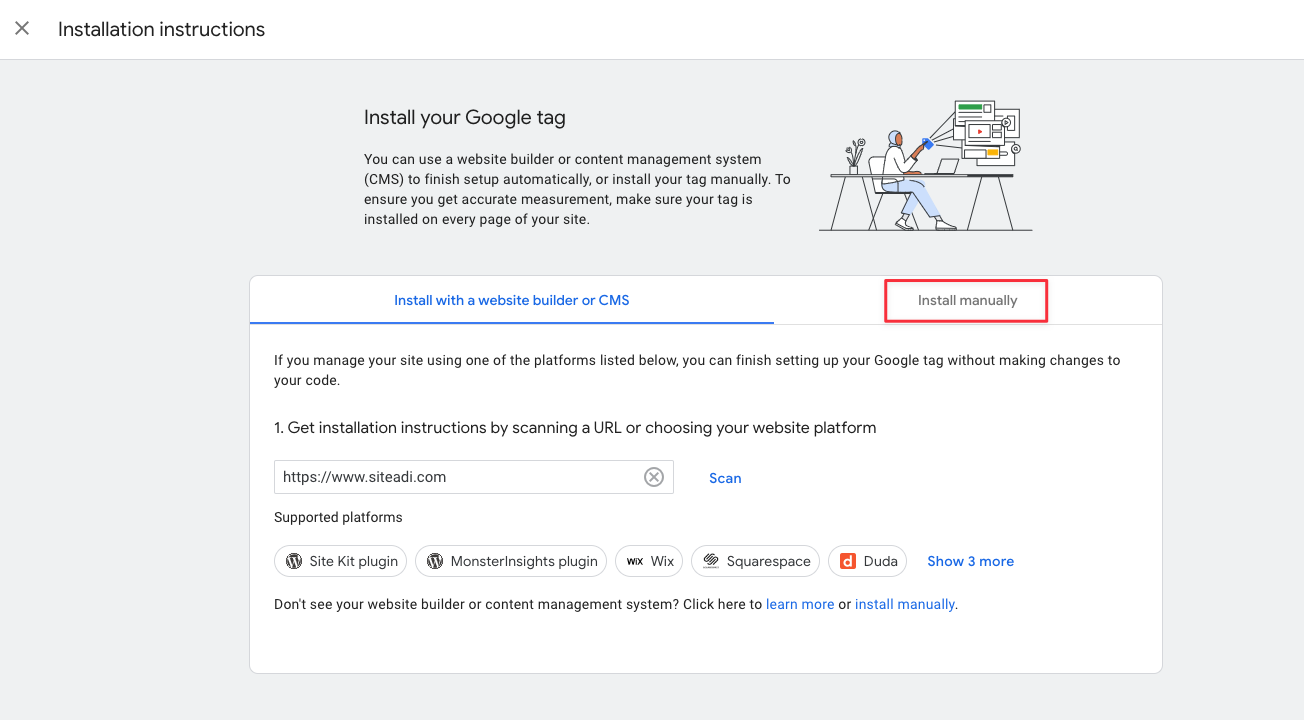
Step 2: Immediately afterwards, copy the tracking code by clicking where I show it below. Pass this tracking code to your developer and ask him to paste it at the top of the <head></head> tags on all pages. Since the testing step is almost the same for both GTM and manual, I will show you how to test if the property works at the end of the GTM method. So when your developer tells you that he added the code, you can test it by following the instructions in the "How to Test Google Analytics 4 Integration" section at the end of the article.
Integration with Google Tag Manager (GTM)
As I mentioned above, I recommend integration with the GTM method. For this, you need to have a GTM account installed on your site. If you do not have an established GTM account, you can easily install it. You can find instructions about GTM installation in our article here.
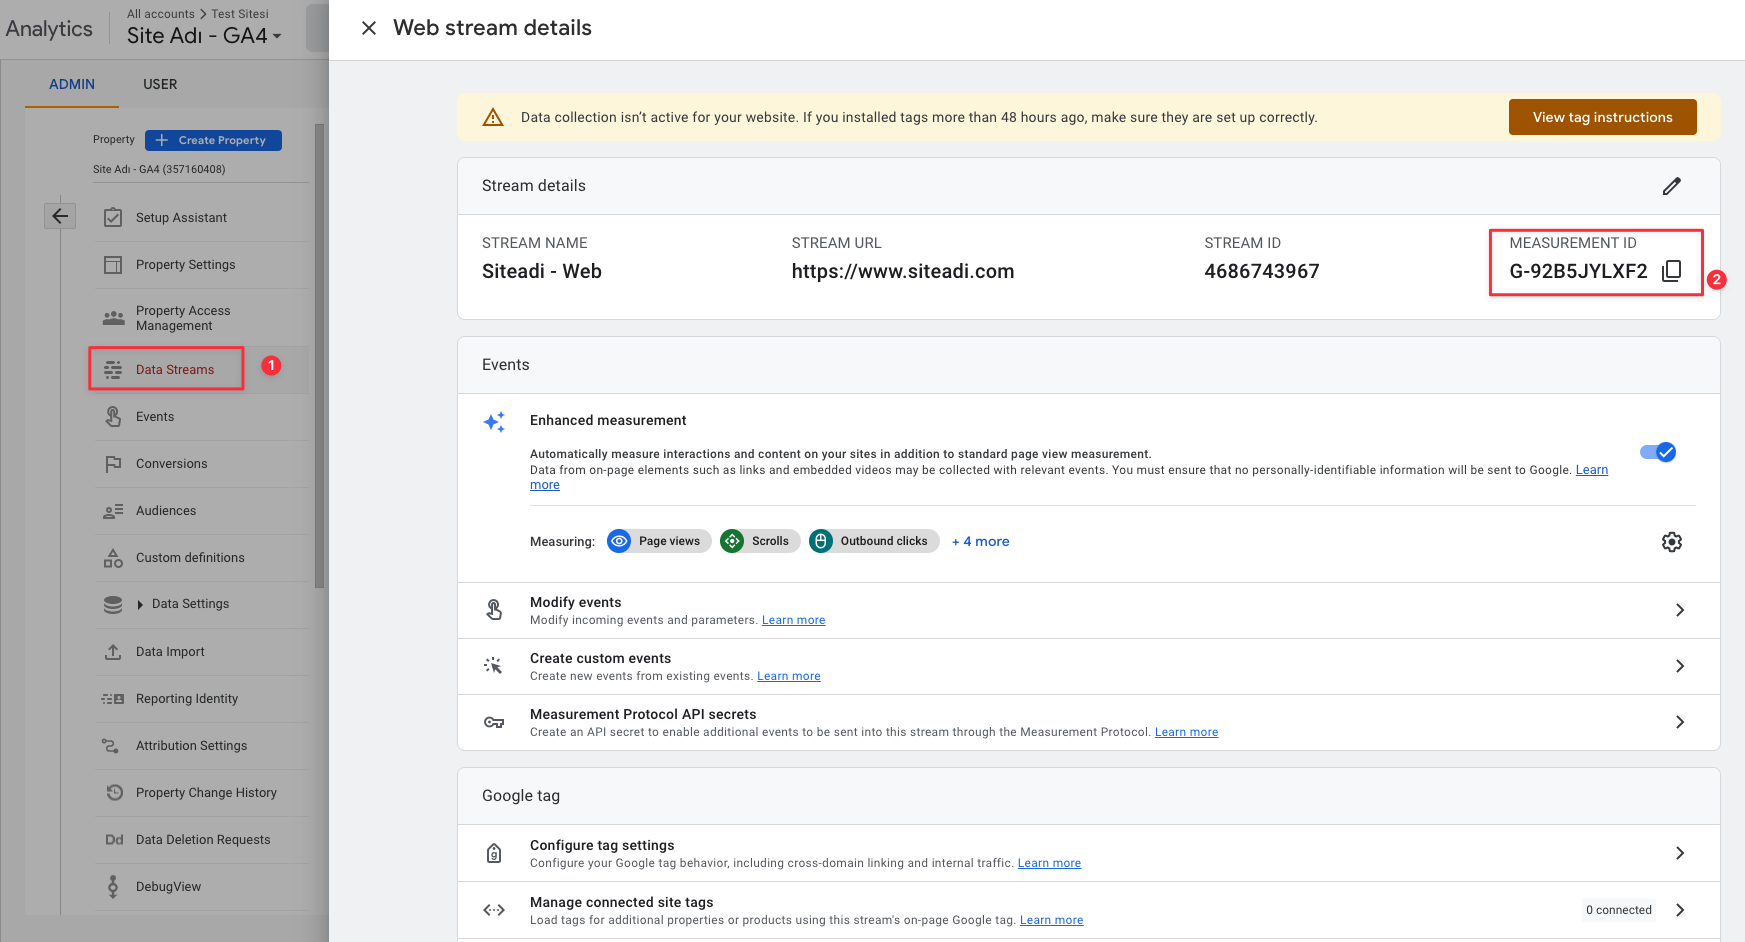
Step 1: Close the previous method screen and the "Data streams" screen will appear as below. If not, you can open this section by clicking "Data streams" under the property menu. Let's copy our ID that I marked as "2" here.
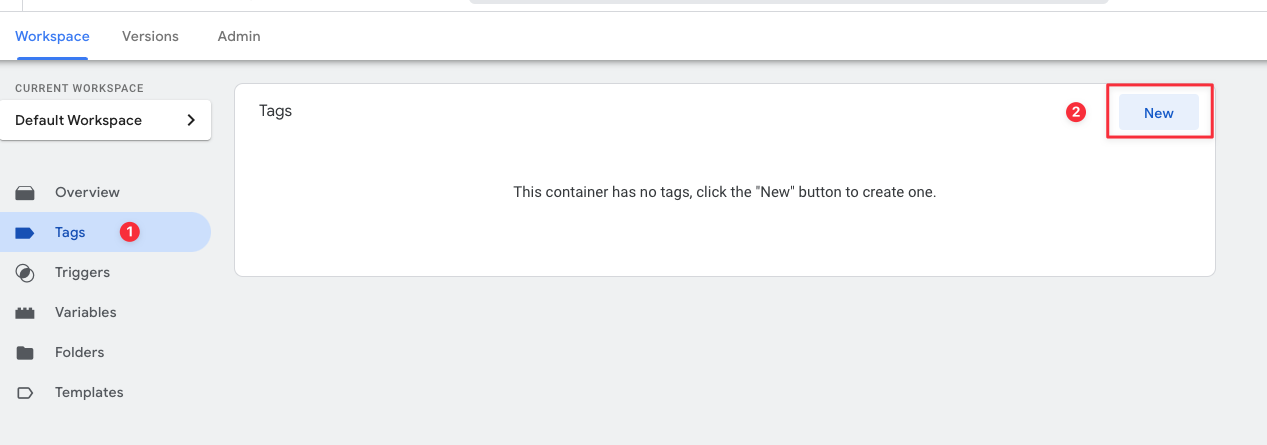
Step 2: Then open our GTM account, go to the "Tags" section from the left menu and click on "New".
Step 3: After that, you can name the field I marked as "1" as you wish. I prefer "GA4 - Configuration" naming in installations.
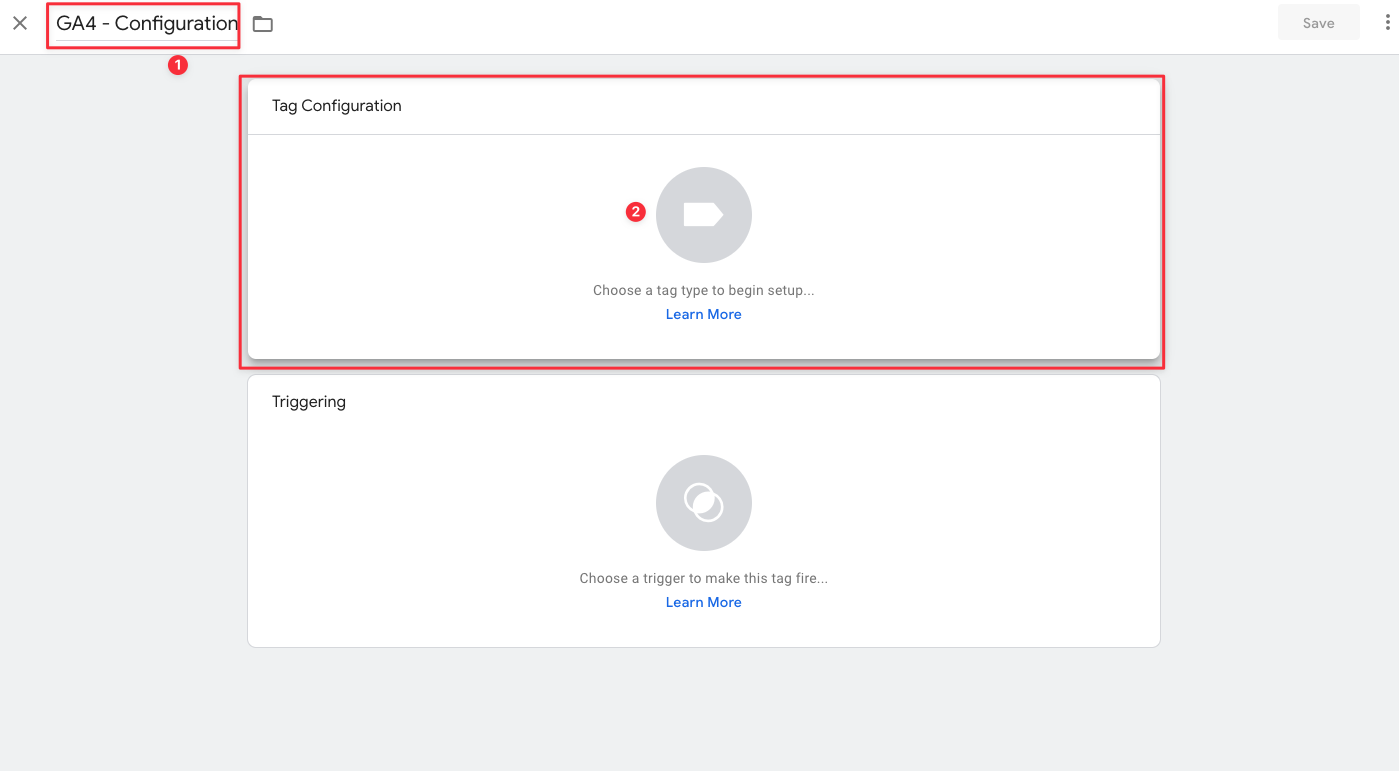
Step 4: Select "Google Analytics: GA4 Configuration" selection.
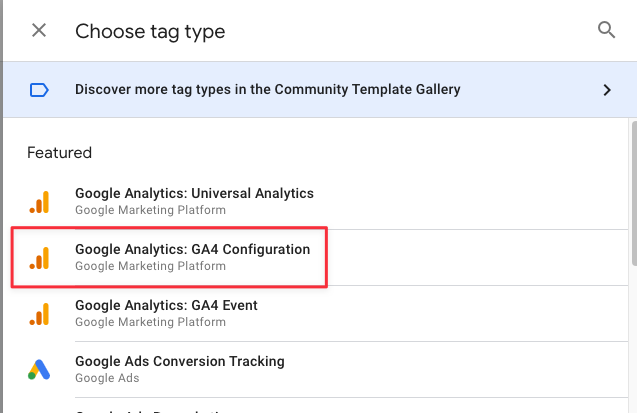
Step 5: Let's paste our ID that we copied in the first step here and click "Triggering".
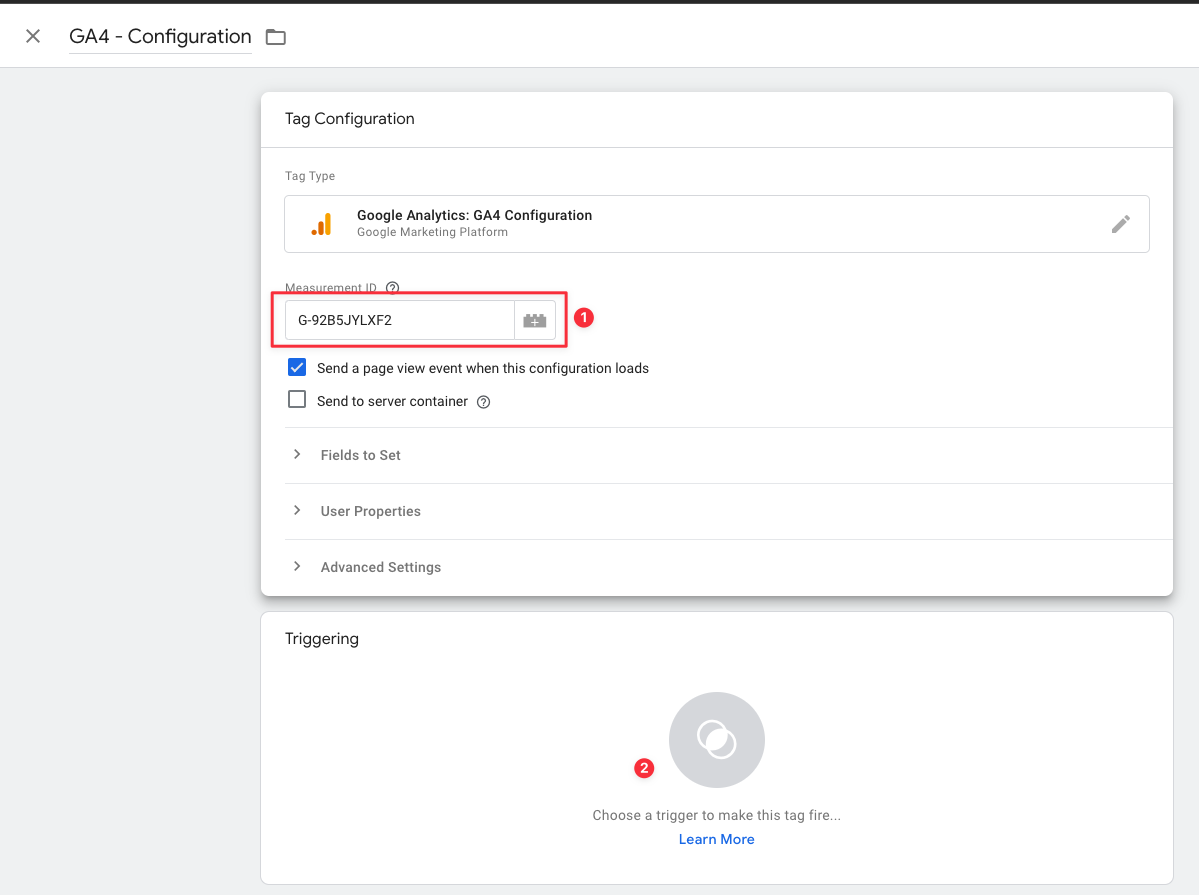
Step 6: Since we will run it on all pages, let's select "All Pages".

Step 7: The final version of our label will look like below. Let's save it by saying "Save".
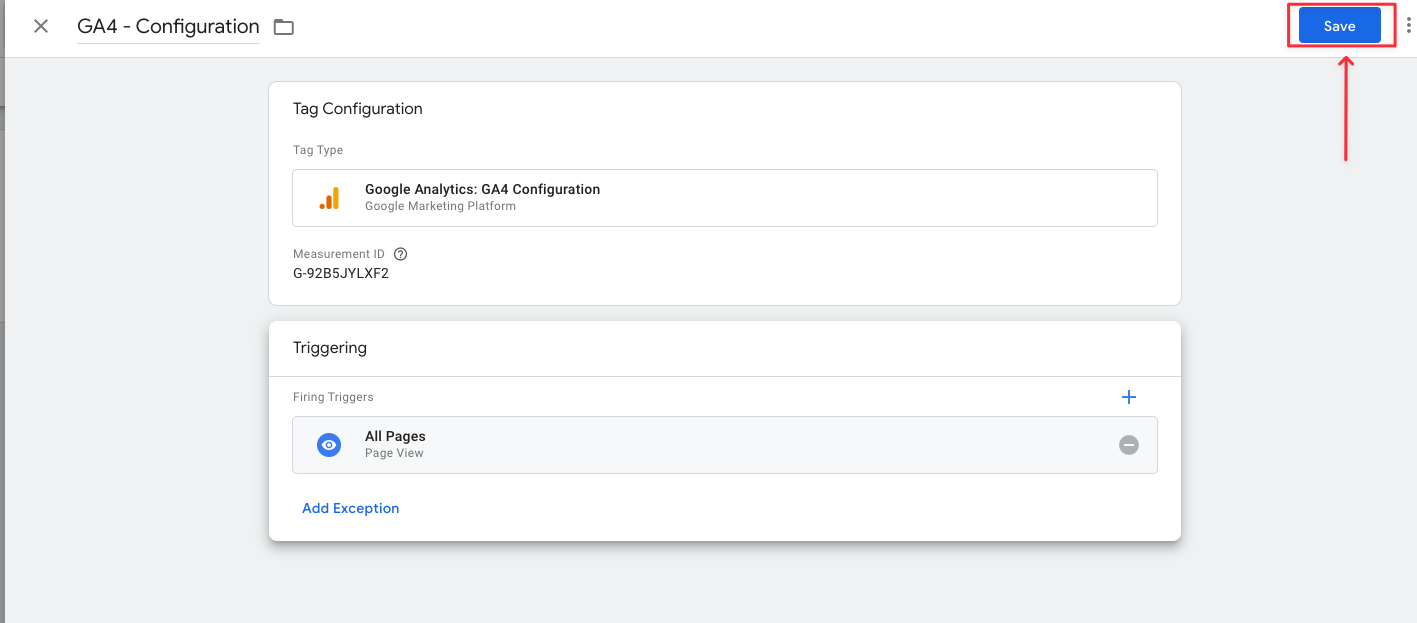
Step 8: Then we need to publish it by saying "Submit". We can publish it by "Submit" and then "Publish".

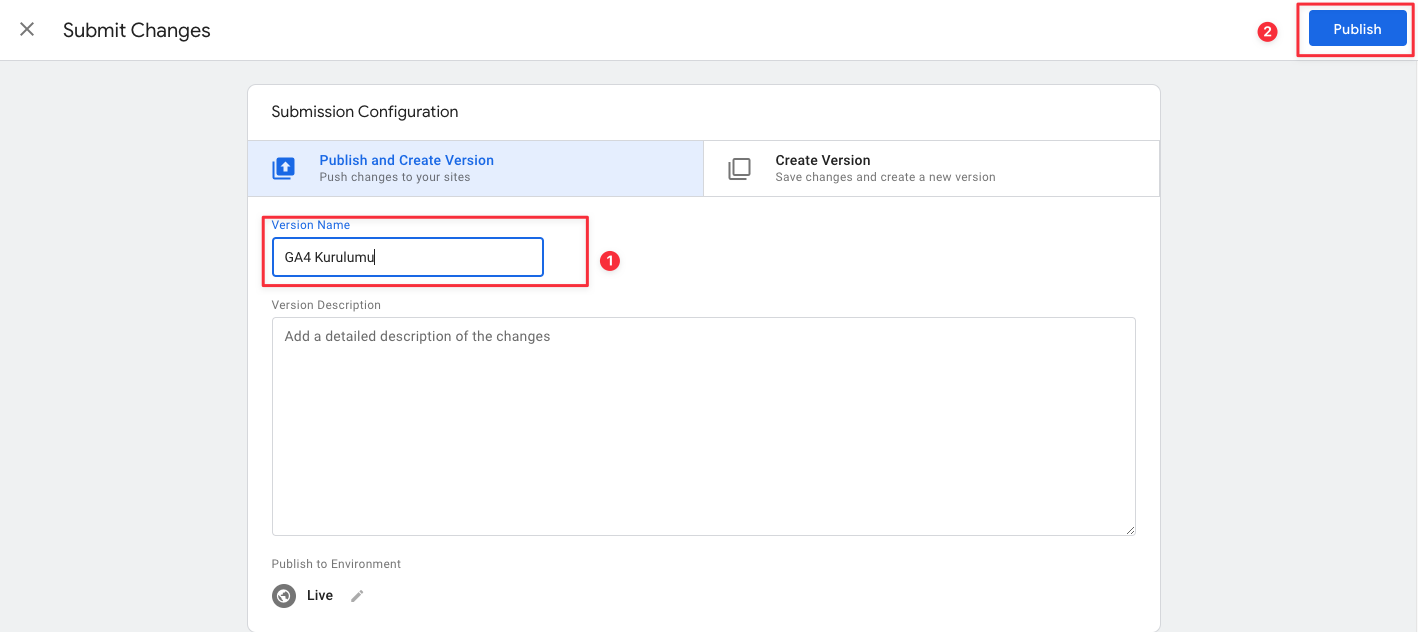
How to Test Google Analytics 4 Integration?
We have realized our Google Analytics 4 integration, let's finally test whether it is active by testing. Although there are different methods for this, I will show the debugging method with the plugin.
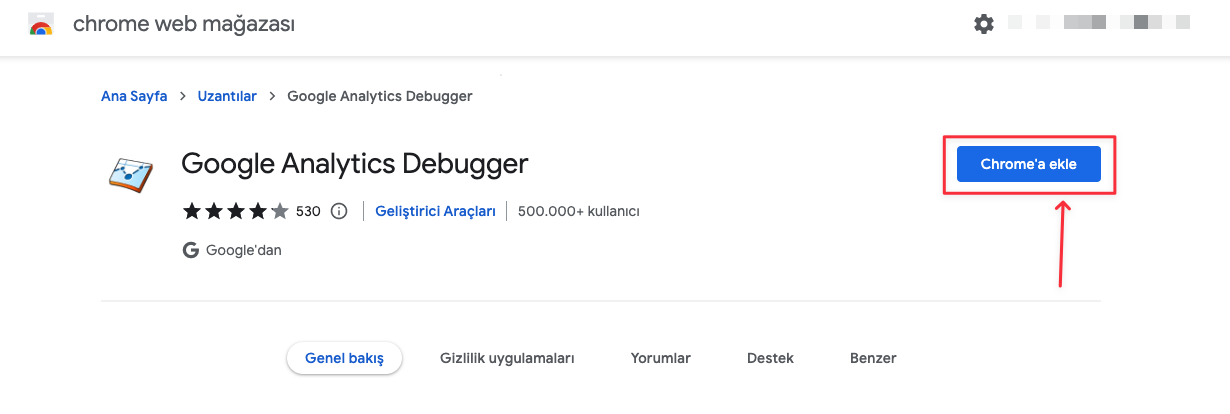
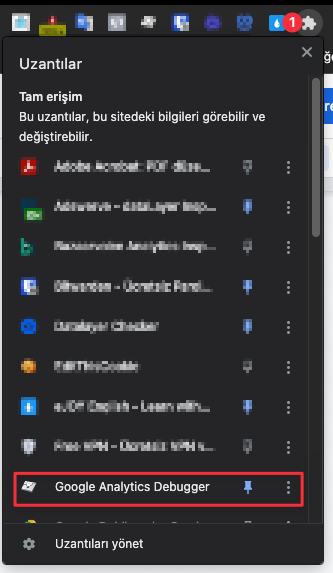
Step 1: Let's install the "Google Analytics Debugger" plugin in our browser. You can access it from here. After installing it, let's pin it to our browser as in the 2nd image.
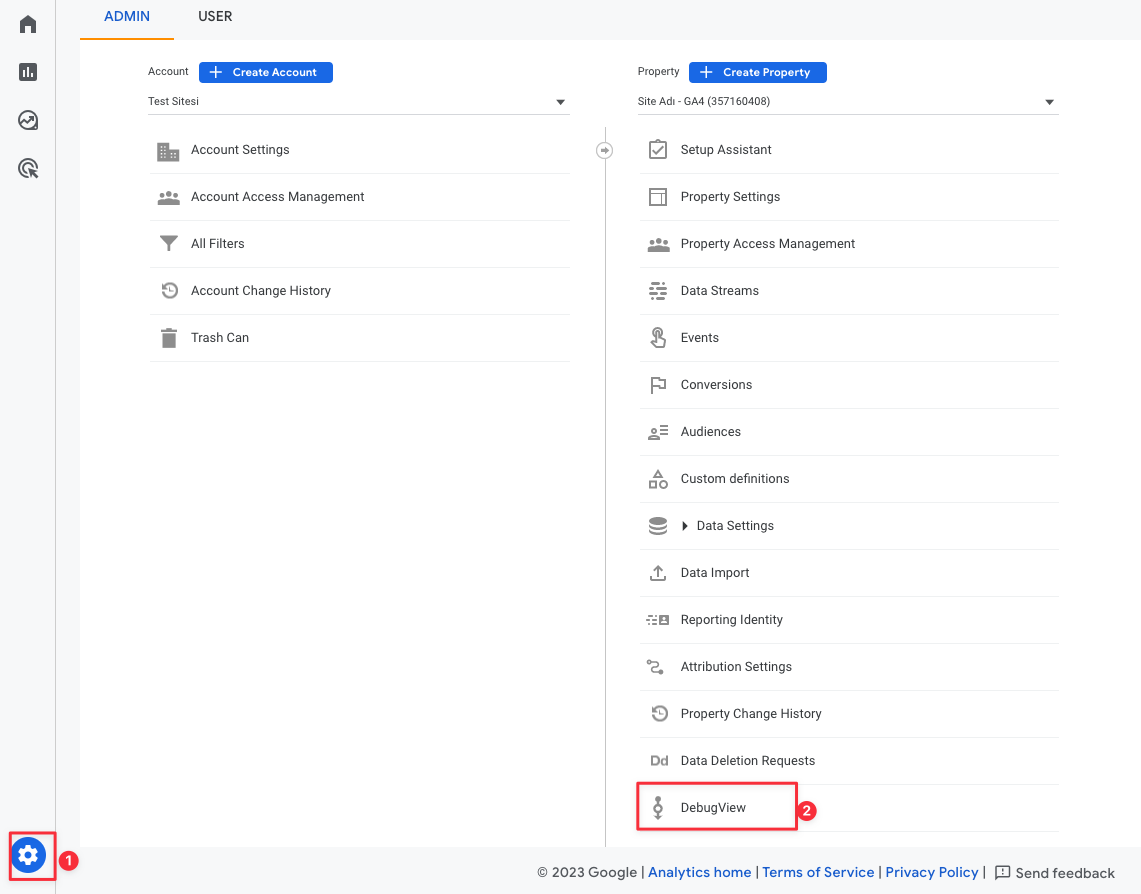
Step 2: Let's go back to our GA4 account and click on the "DebugView" field.
Step 3: Let's enter our site and click once on the plugin we just installed and turn it "ON".

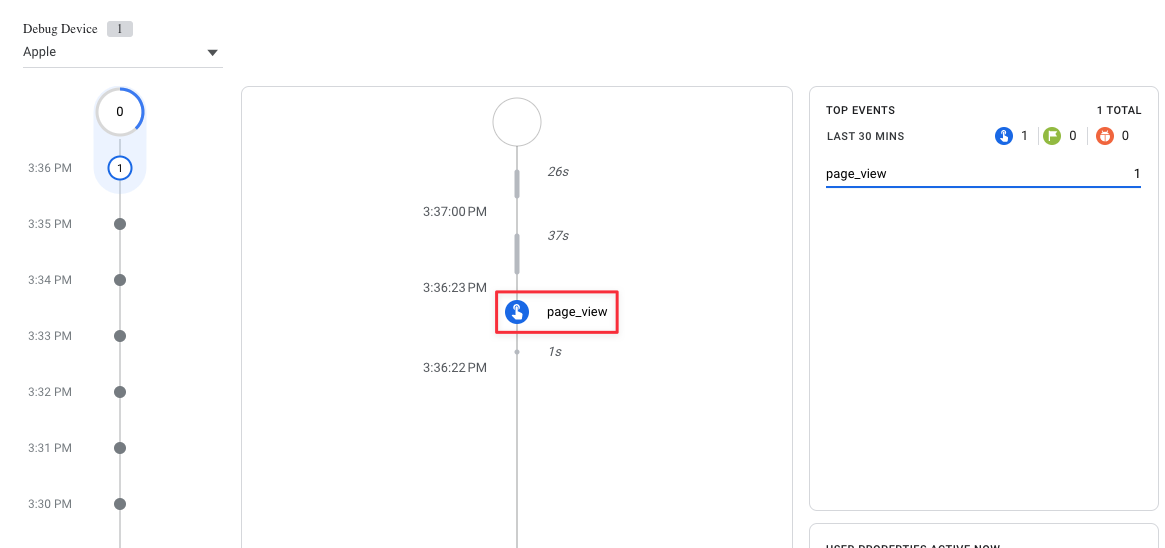
Step 4: Then let's go back to the "DebugView" area and wait a bit. In 1-2 minutes you should see a page_view activity like below :) Congratulations! You have successfully installed the GA4 tool.
Note: Sometimes the "DebugView" field can run very late, so if you are sure that you have installed it correctly, you can also check the live data via the Real time report.
