How to Track Mouse Hover on Google Analytics 4 with GTM?
The areas we may want to measure on websites are almost limitless. Although we think that tracking clicks gives us the most information about user behavior, we may want to track many different areas such as video viewing, scroll, timer, element visibility. In this article, I will try to explain step by step how to measure mouse hover, that is, the interaction that occurs when hovering over an area.
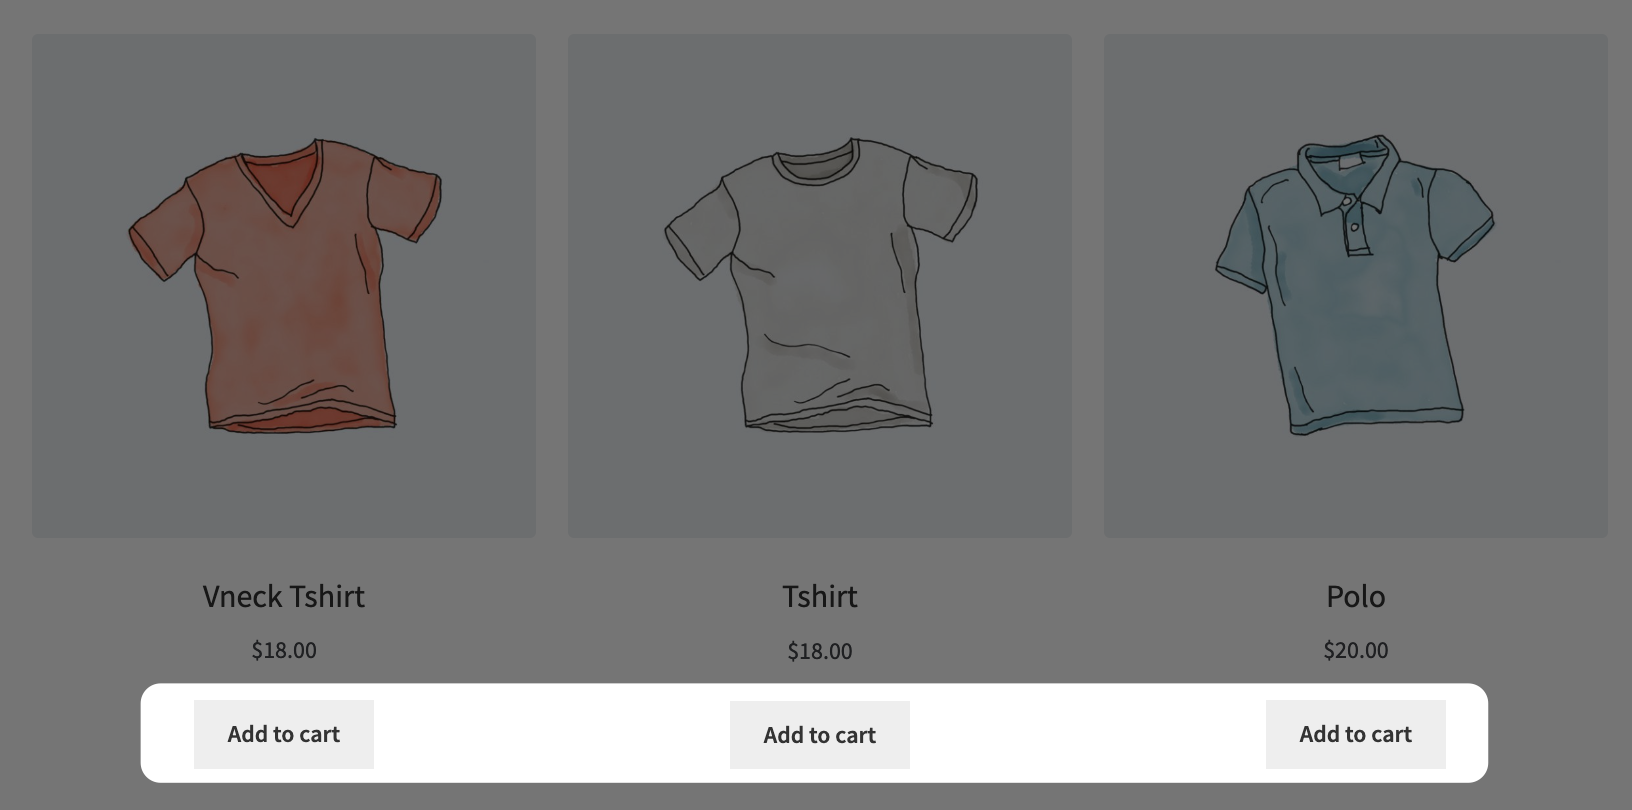
For example, let's assume that we need such tracking on our e-commerce site. Let's try to create a tracking that will work when hovering over our "Add to cart" buttons as below.
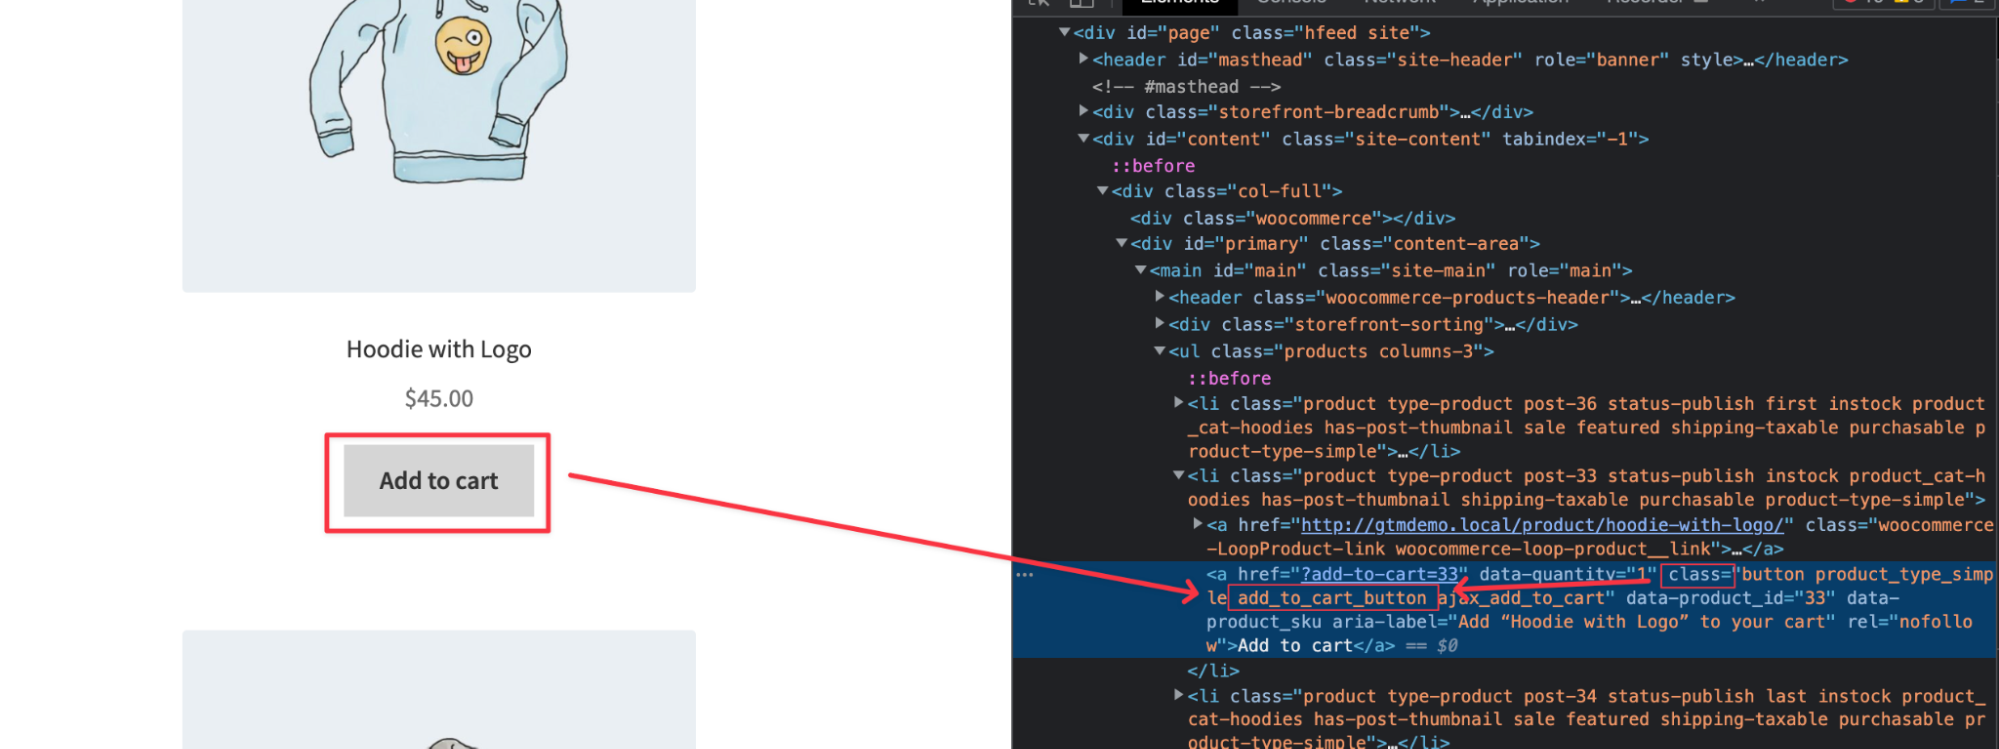
First, we hover over the area we want to track and right click and say "Review". This is how we can see the class or ID values of our element, if any. Here, I copy the "add_to_cart_button" class value that I marked in the image below and write it down somewhere.
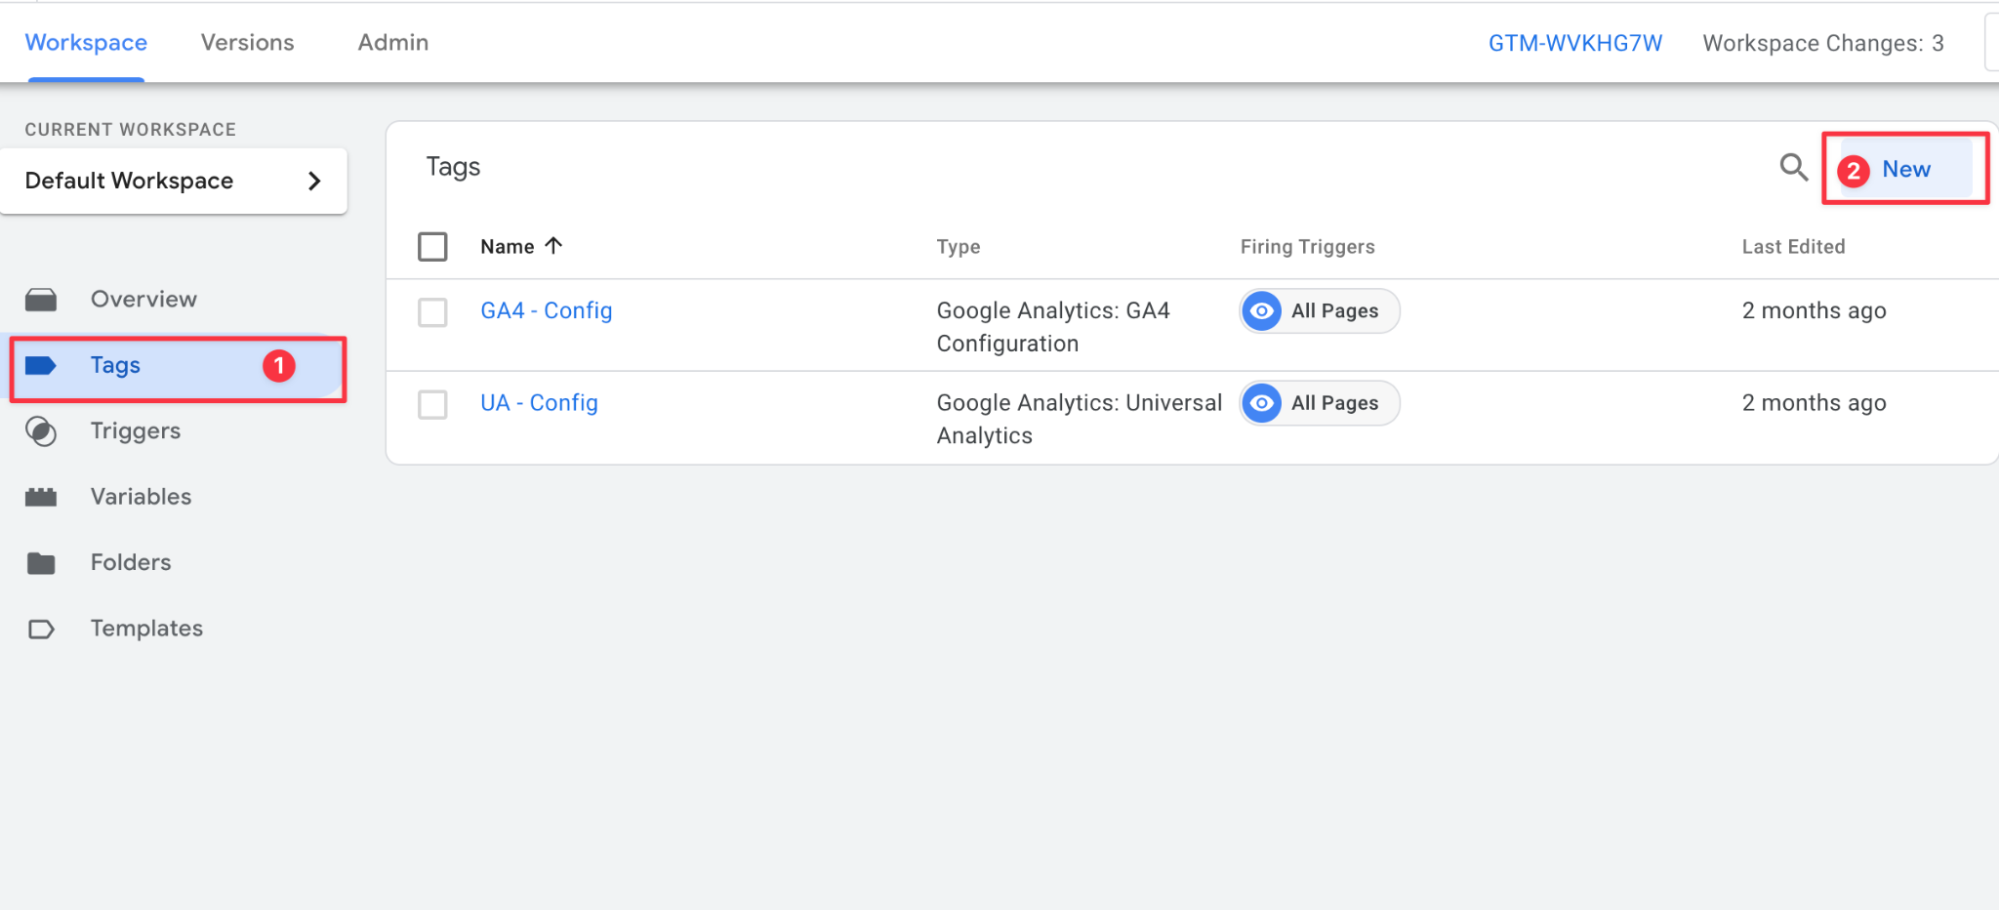
Let's enter our Google Tag Manager account installed on our site. Click on the "Tags" section from the left panel and then say "New" in the section I have marked below.
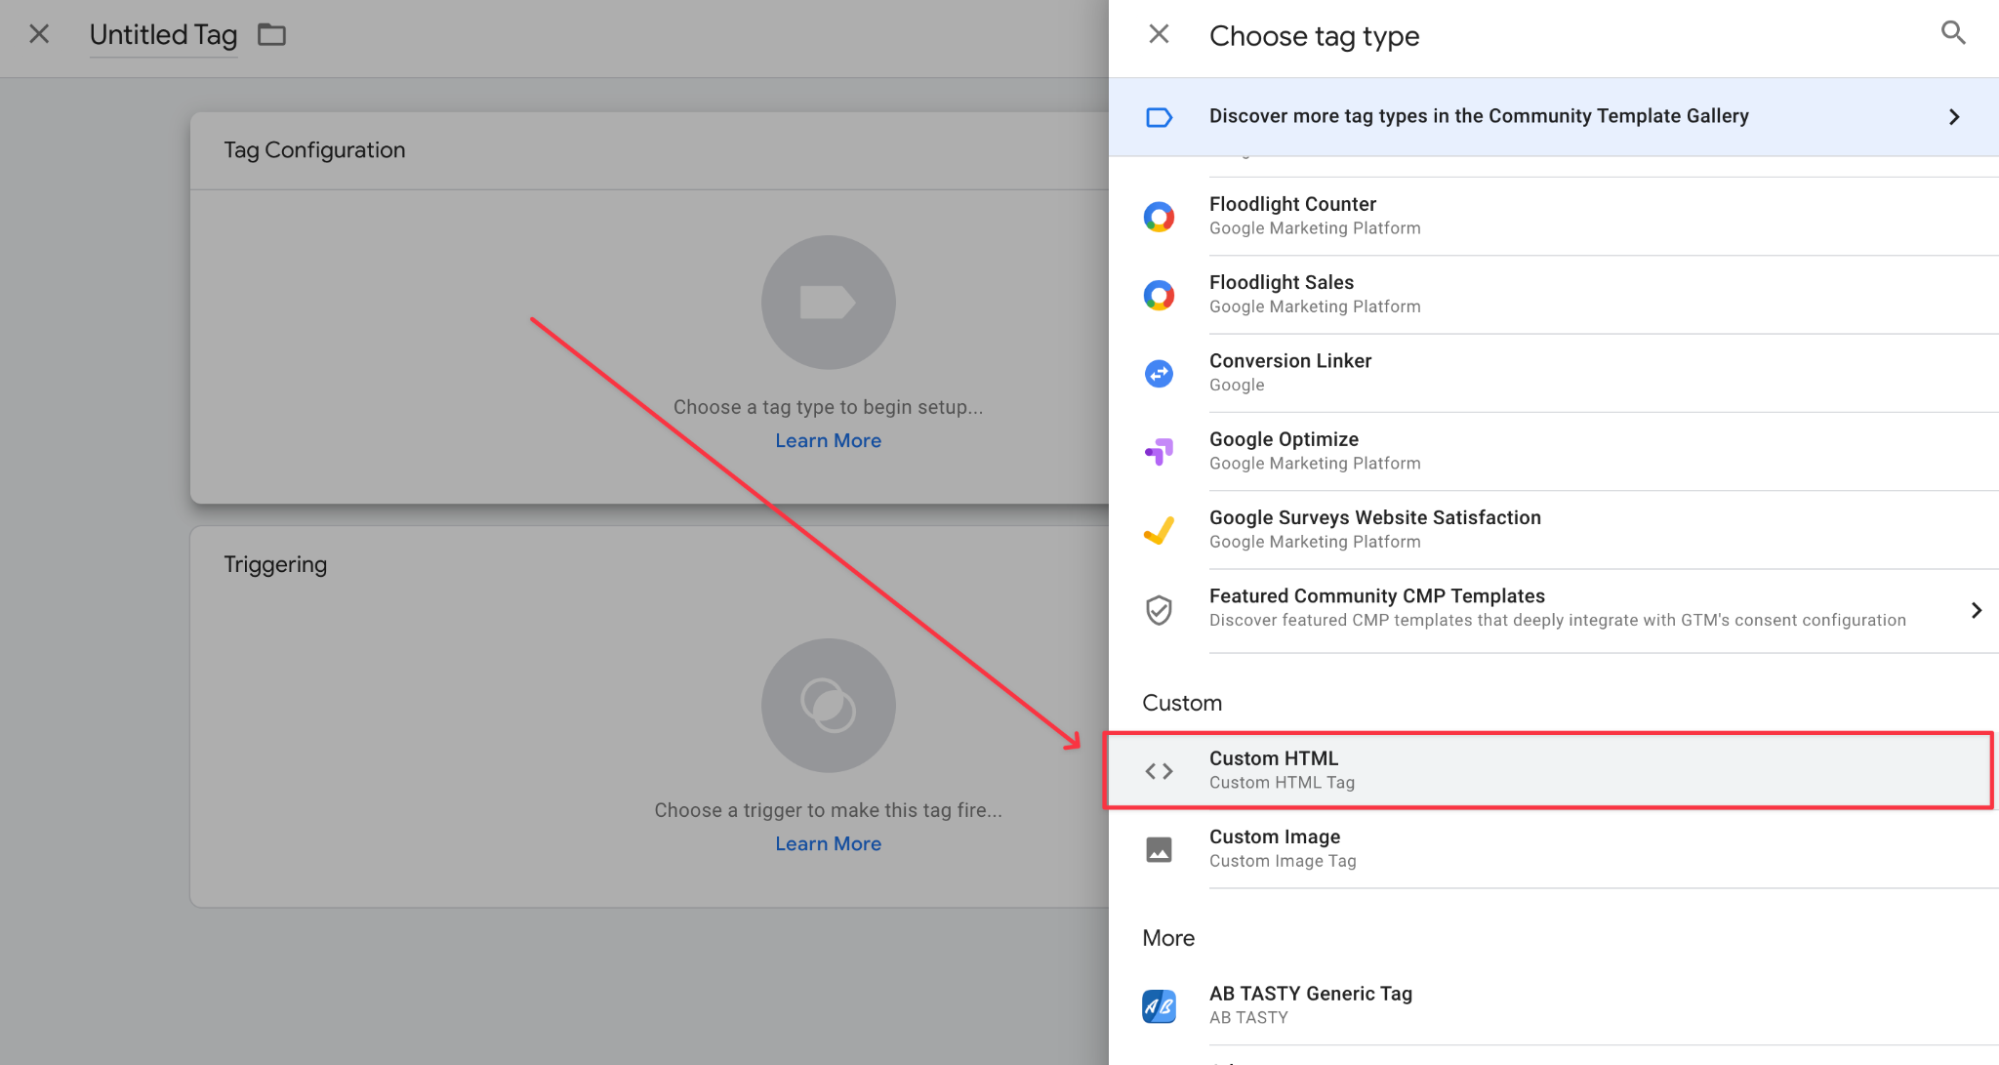
Mouse hover does not have a built-in listener on GTM, we need to create it as custom, so after saying "New", click on "Tag Configuration" and select "Custom HTML" from the section on the right.
Then copy and paste the code below into the "Custom HTML" tag. This code block actually does the following: When the element with the "add_to_cart_button" class value, which we noted above, hovers over the element for 3 seconds, it runs a dataLayer and transmits it to GTM.
You should adapt this piece of code to your needs. You should replace the class value I specified as "add_to_cart_button" with the class value of your element. Since it is a class selector, let's not forget to use a period in the beginning. You can also change the timer according to your own scenario. For example, if you have a hover action that shows text when hovered over, if you think that it will take about 5 seconds for the user to read the text, you can change the "3000" value in the related field to "5000".
<script>
var btnInfoElements = document.querySelectorAll('.add_to_cart_button');
for (var i = 0; i < btnInfoElements.length; i++) {
btnInfoElements[i].addEventListener('mouseover', function(){
var button = this;
var timer = setTimeout(function(){
var buttonText = button.textContent.trim();
dataLayer.push({
'event': 'hover',
'element': 'Button',
'elementText': buttonText
});
}, 3000);
button.addEventListener('mouseout', function(){
clearTimeout(timer);
});
});
}
</script>
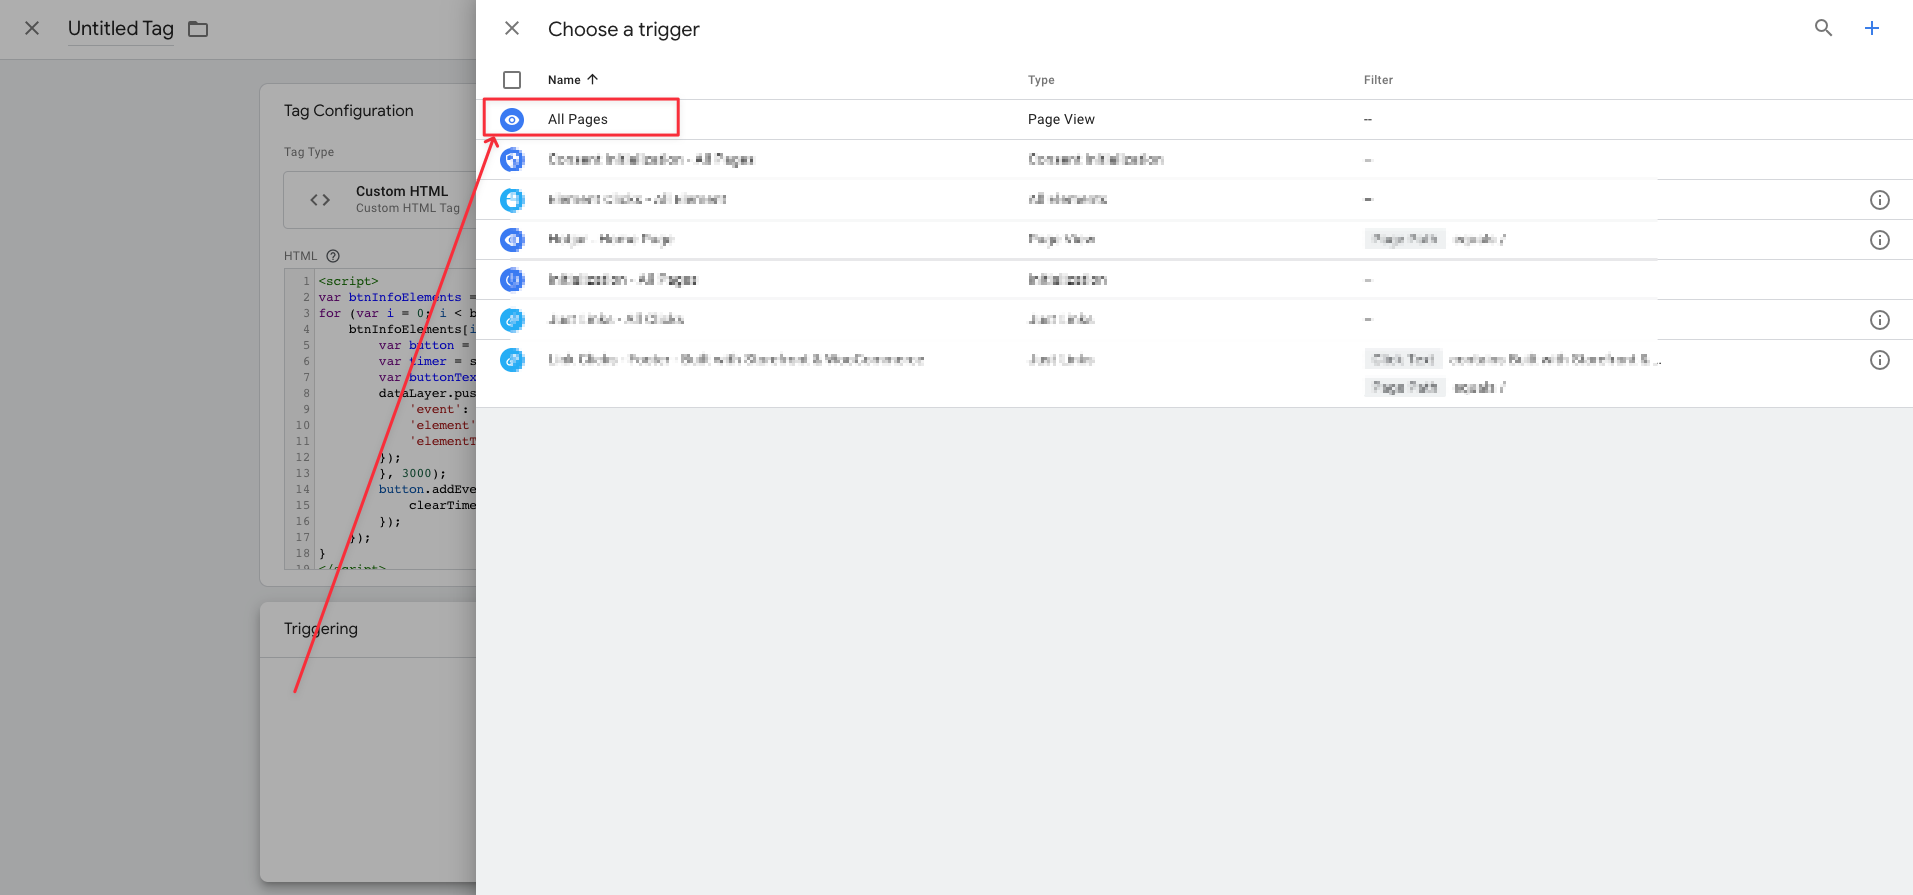
After setting our code fragment and pasting it into the tag section, we have to choose the conditions under which this code will work. For this, I click on the "Triggering" section and select "All Pages". I chose "All Pages" because I want to listen to the "Add to cart" buttons on all pages, if you want to listen on a specific page, you can customize it accordingly.
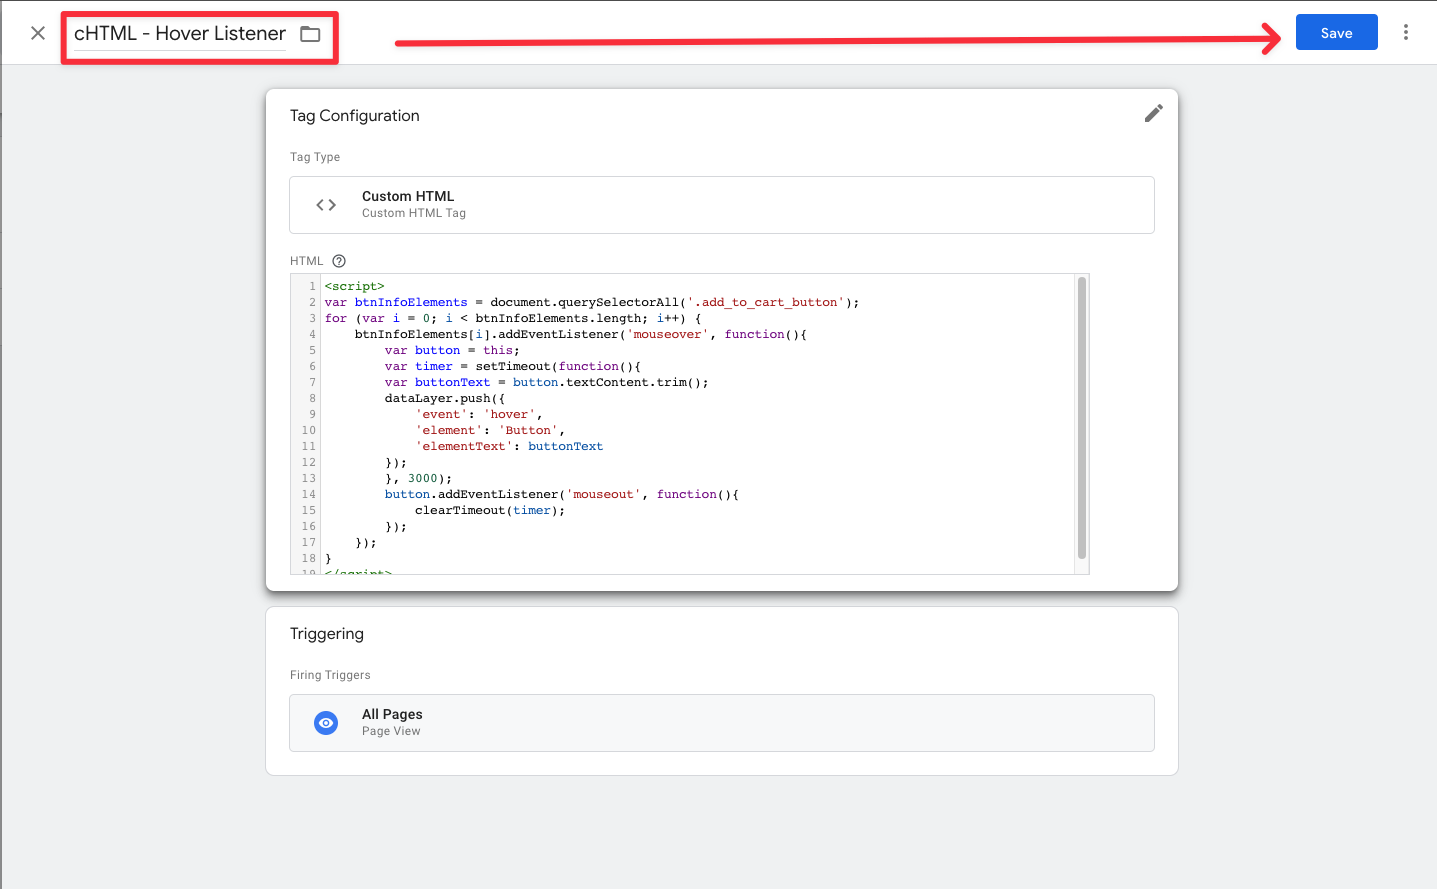
After making all the adjustments, my tag gets the final form below. I specify "cHTML - Hover Listener" as the name and click the "Save" button.
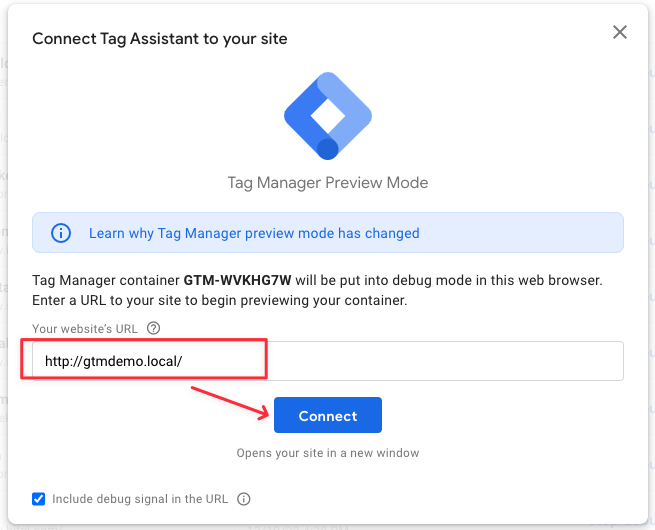
Now it's time to test... I go back to the Google Tag Manager panel and click on the "Preview" button on the top right. I type the page URL I will test and click on the "Connect" button.
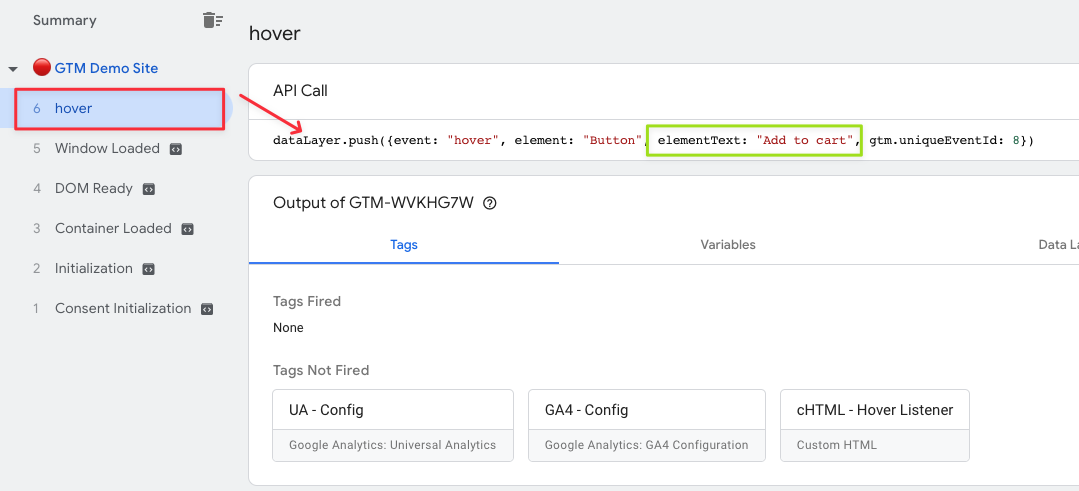
After the connection is established, I wait for 3 seconds on the "Add to cart" button under a random product. When I return to the summary screen, I see an image like below. In other words, my JS code block worked and sent a custom event to GTM when I hovered over the button for 3 seconds. Here I would like to draw your attention to one more area. In the green area, you can see the text data of the hovered element. I won't use it in my scenario, but if you have a hover action that shows something like a description, you can define it as a dataLayer variable and send this information to Google Analytics 4.
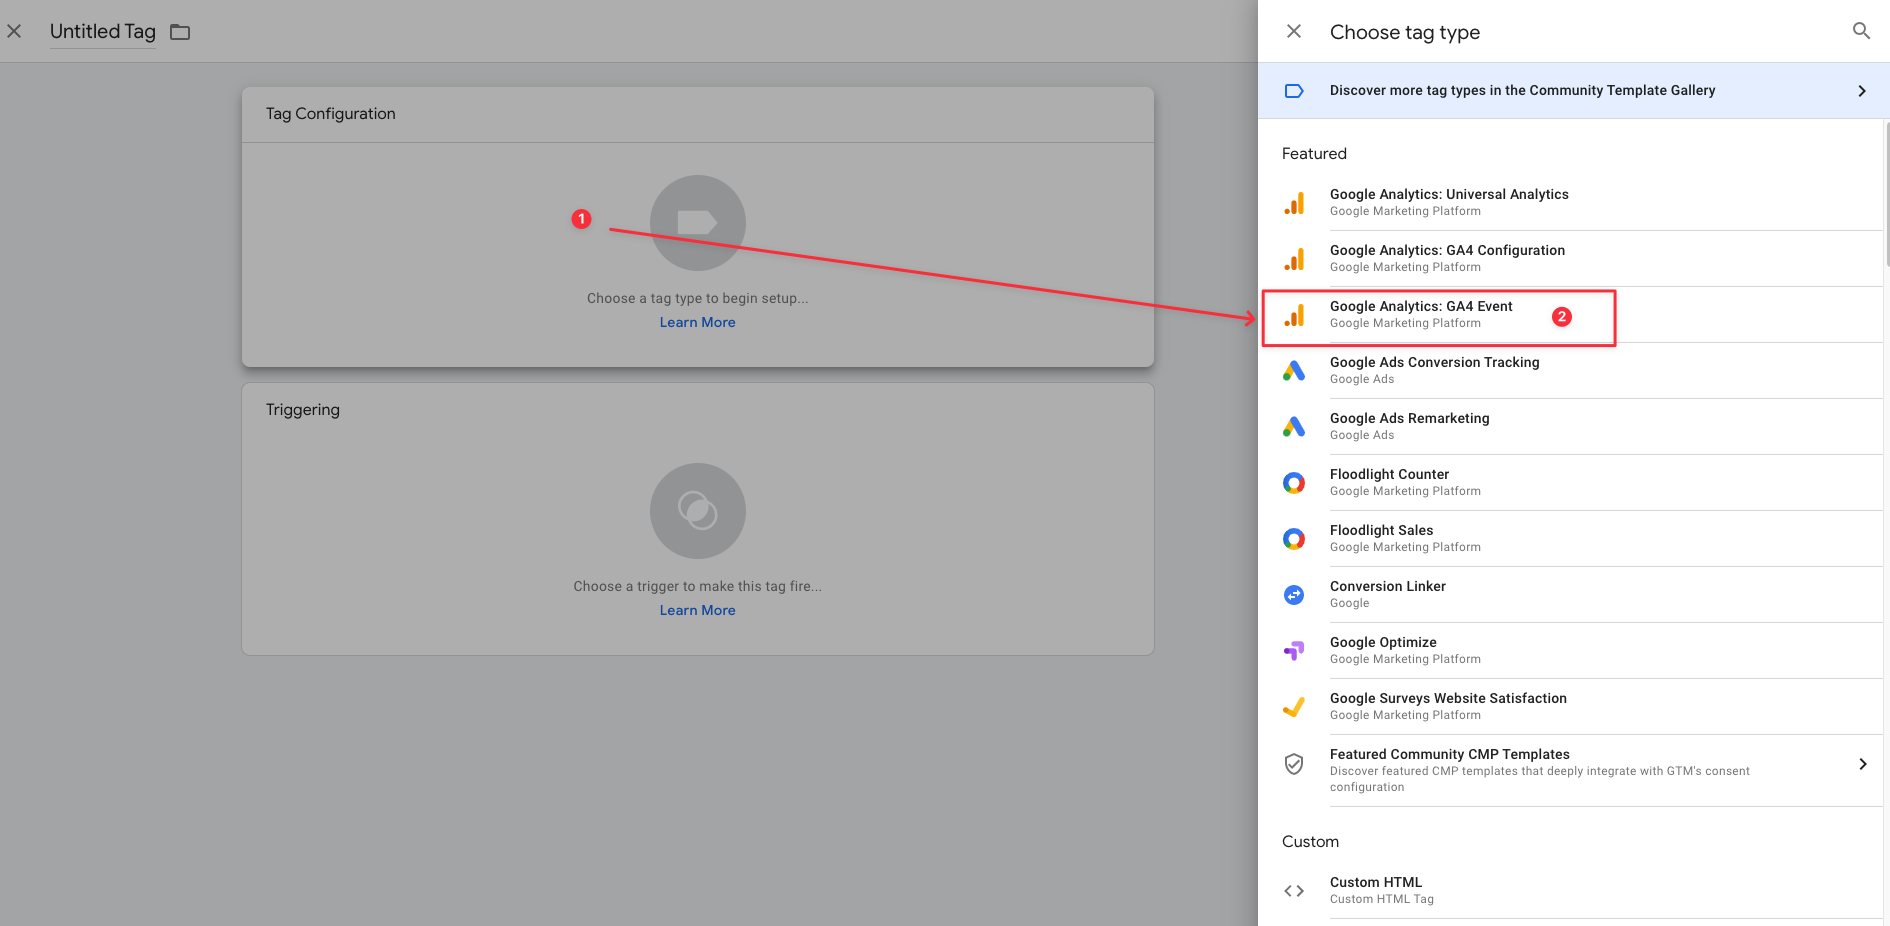
It's time to send our successfully listened event to Google Analytics 4. We come back to the Tags field and select "Google Analytics: GA4 Event" selection.
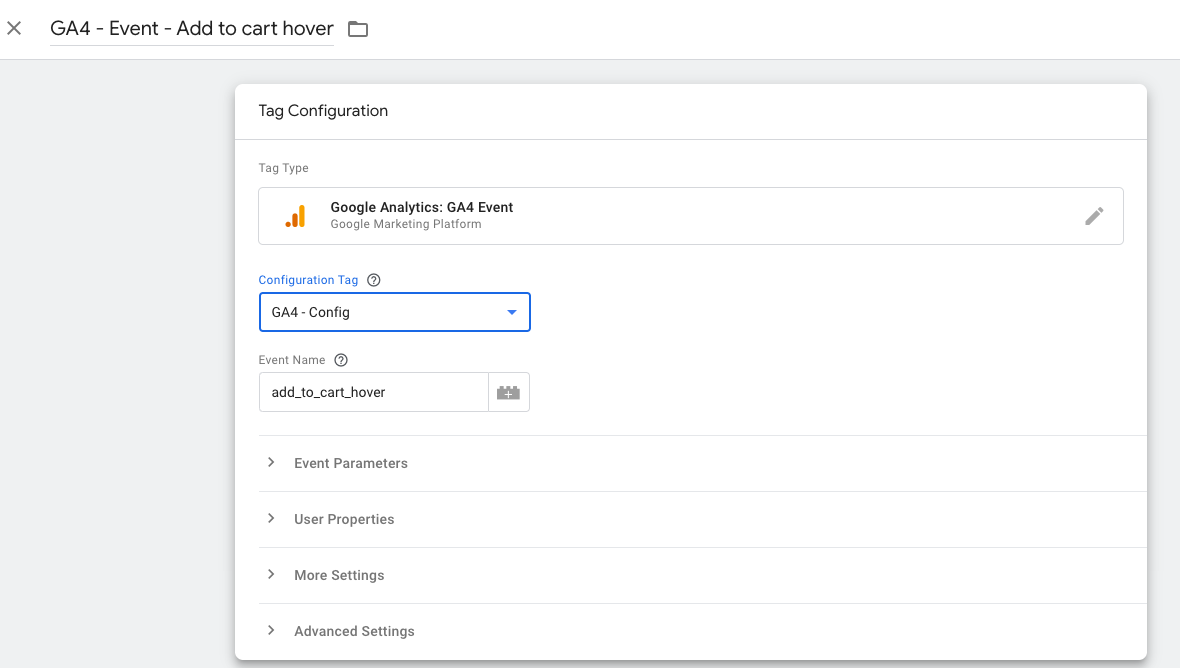
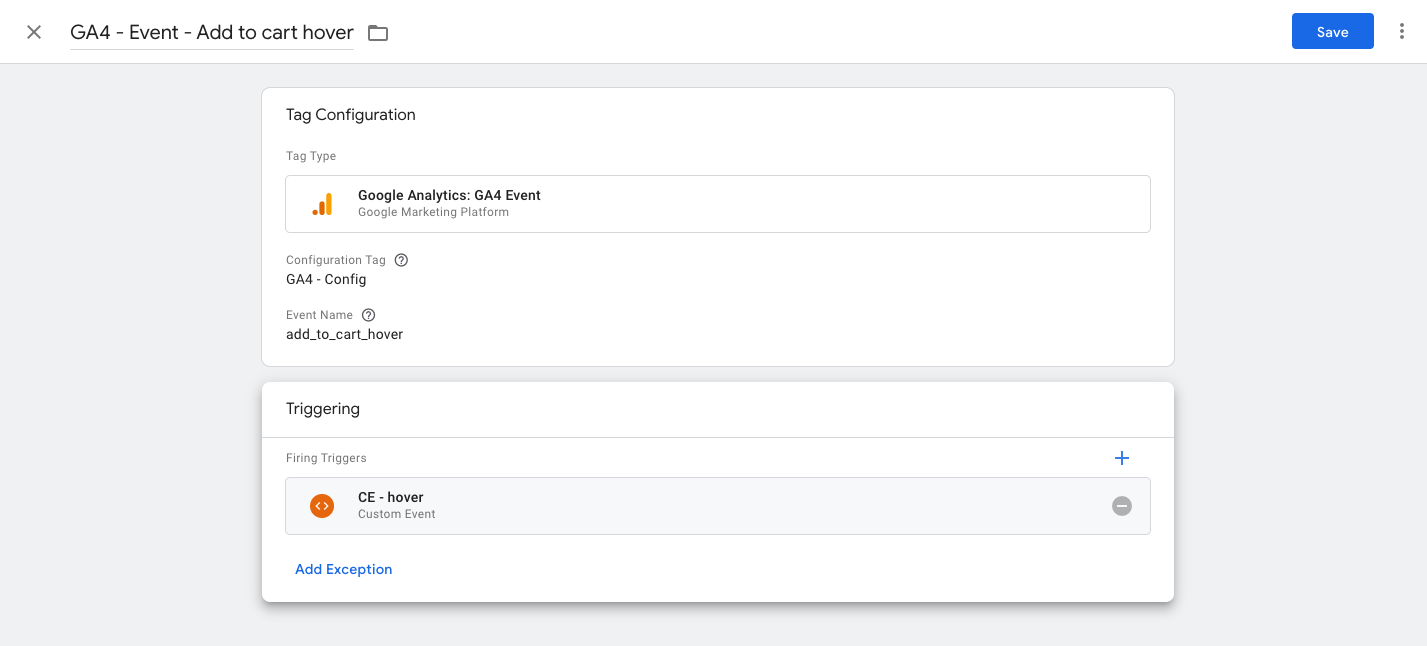
I make the tag settings as follows. In the "Configuration Tag" field, you must select the GA4 account you want to send the data to. In the event name section, you can specify an event name of 40 characters long by using "_" in between as I wrote.
I also named the tag name at the top left as "GA4 - Event - Add to cart hover". Here again, you can enter a tag name as you wish.
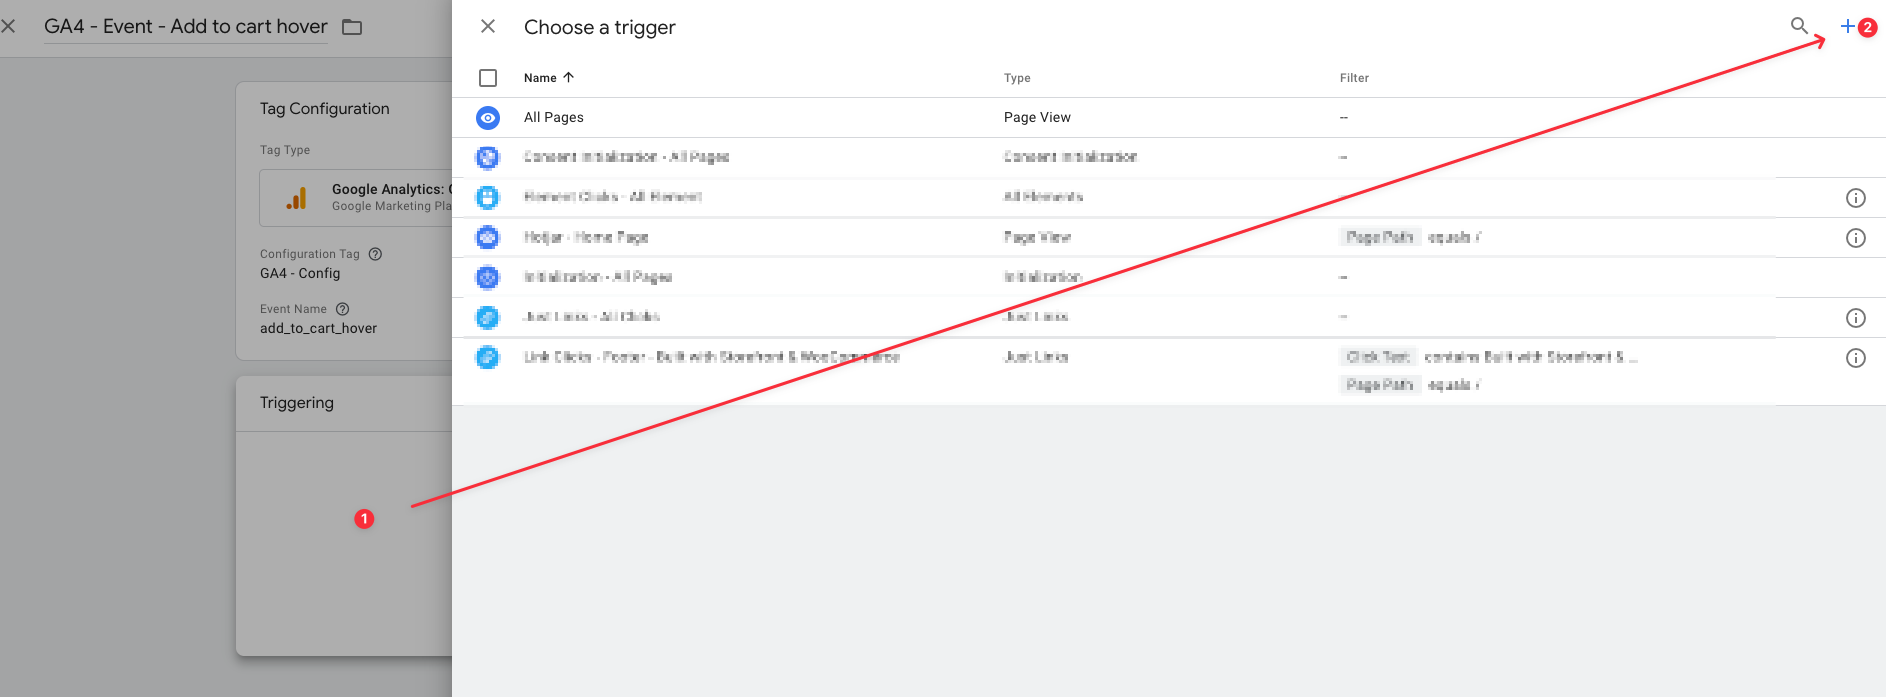
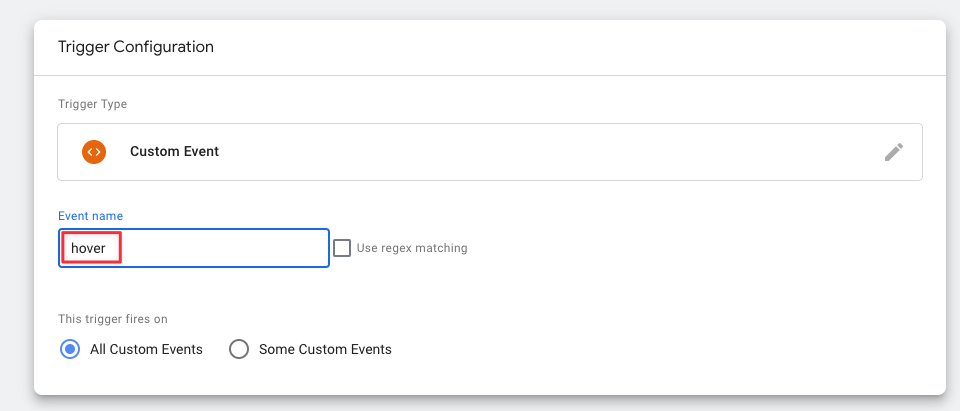
Now let's move on to the trigger part. When we click on the trigger, let's click "+" in the field that opens.
Then let's follow these steps;
- Let's name the Trigger. I named it "CE - hover". I specified it as "CE" as the abbreviation of the initials of Custom Event, you can name it as you wish in this field.
- Let's click on the Trigger container.
- Let's select Custom Event.
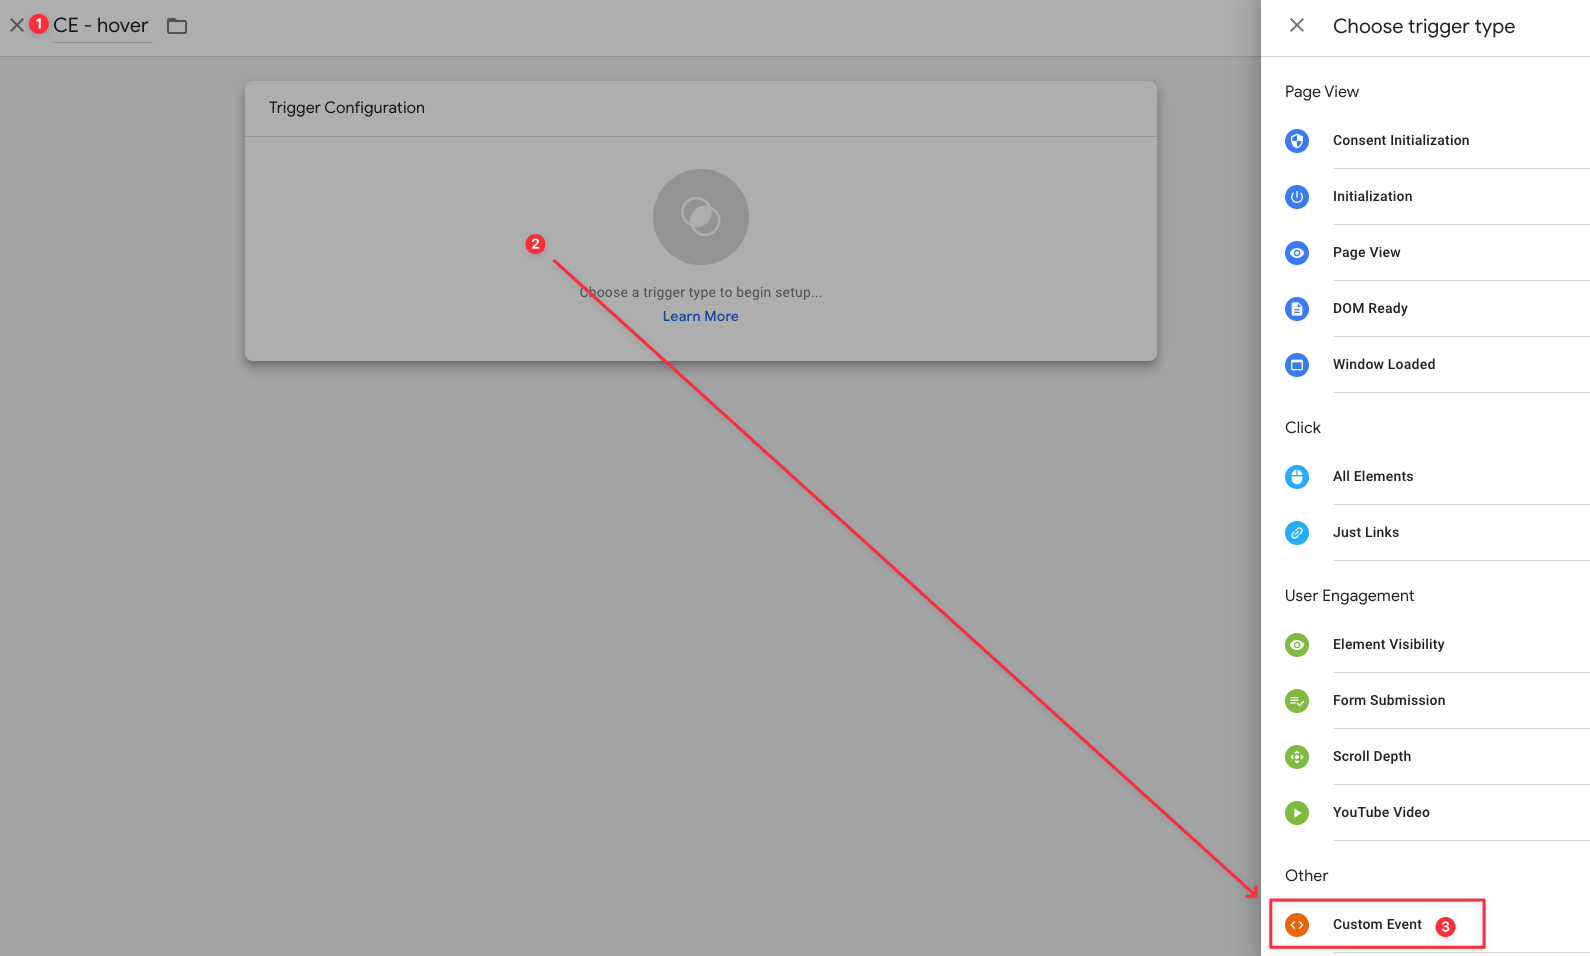
Save by typing "hover" in the event name field.
The final version of our tag looks like below. If we think it is ready, let's create the tag by saying "Save".
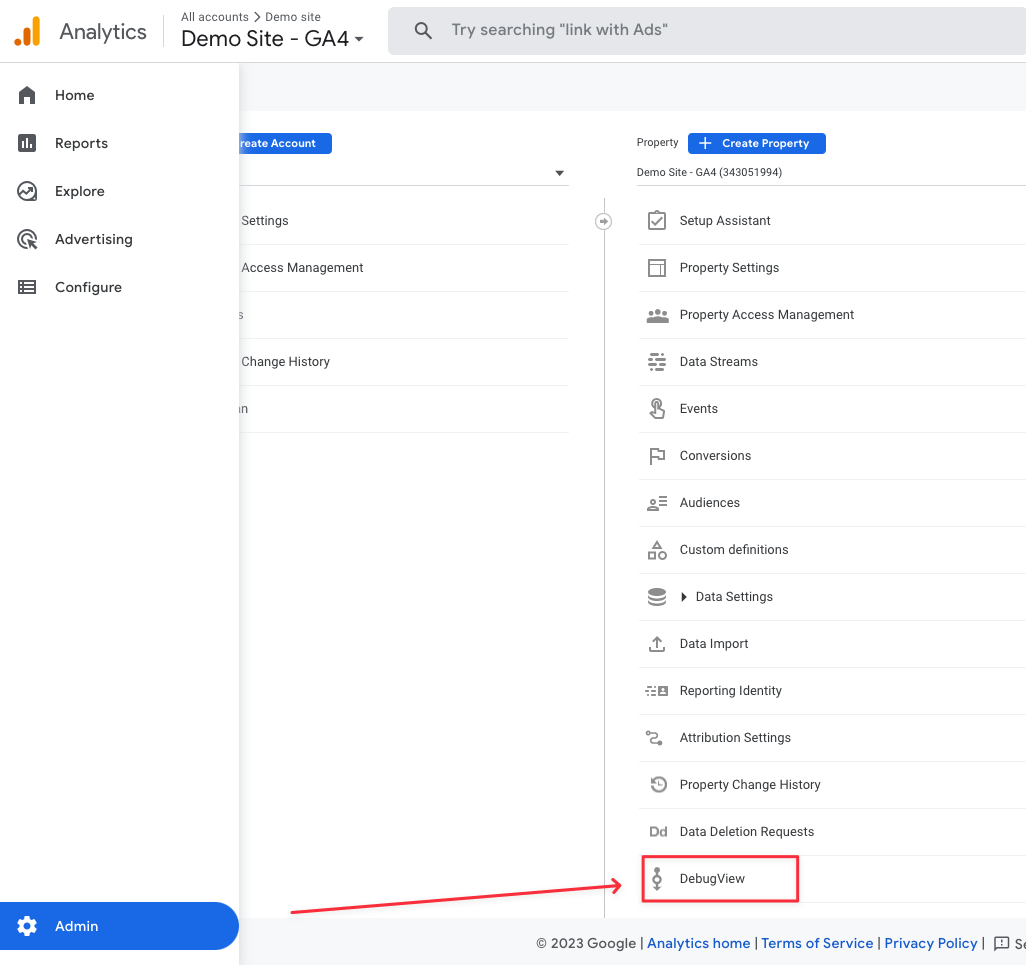
Just like in the section where we tested the code block, let's open the "Preview" mode again. Meanwhile, let's open our Google Analytics 4 account and enter the "DebugView" field below.
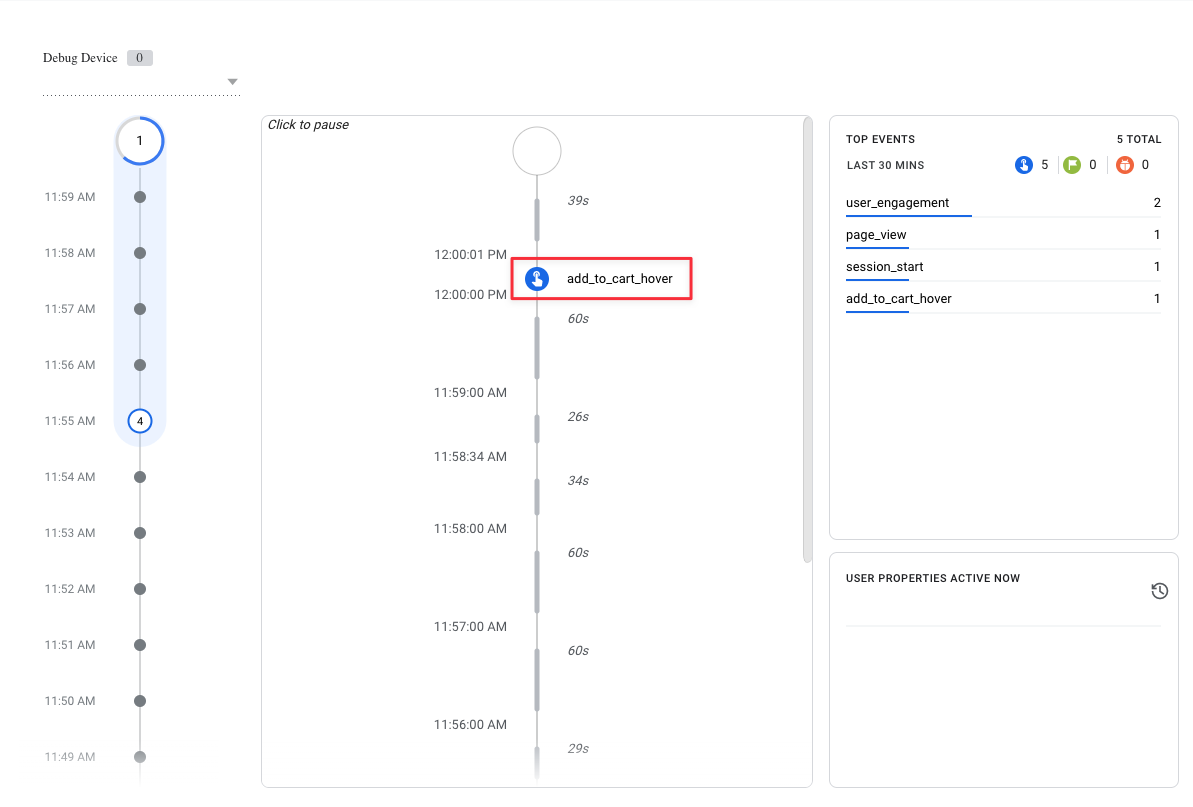
When we open the Google Tag Manager "Preview" mode, all the actions we take on the site start to appear in the DebugView area. I hover over the "Add to cart" button of a product on the site and wait for 3 seconds. Then I return to my Google Analytics 4 account and look at the "DebugView" section.
I see my "add_to_cart_hover" action in the Debug field, which means we succeeded.🙂
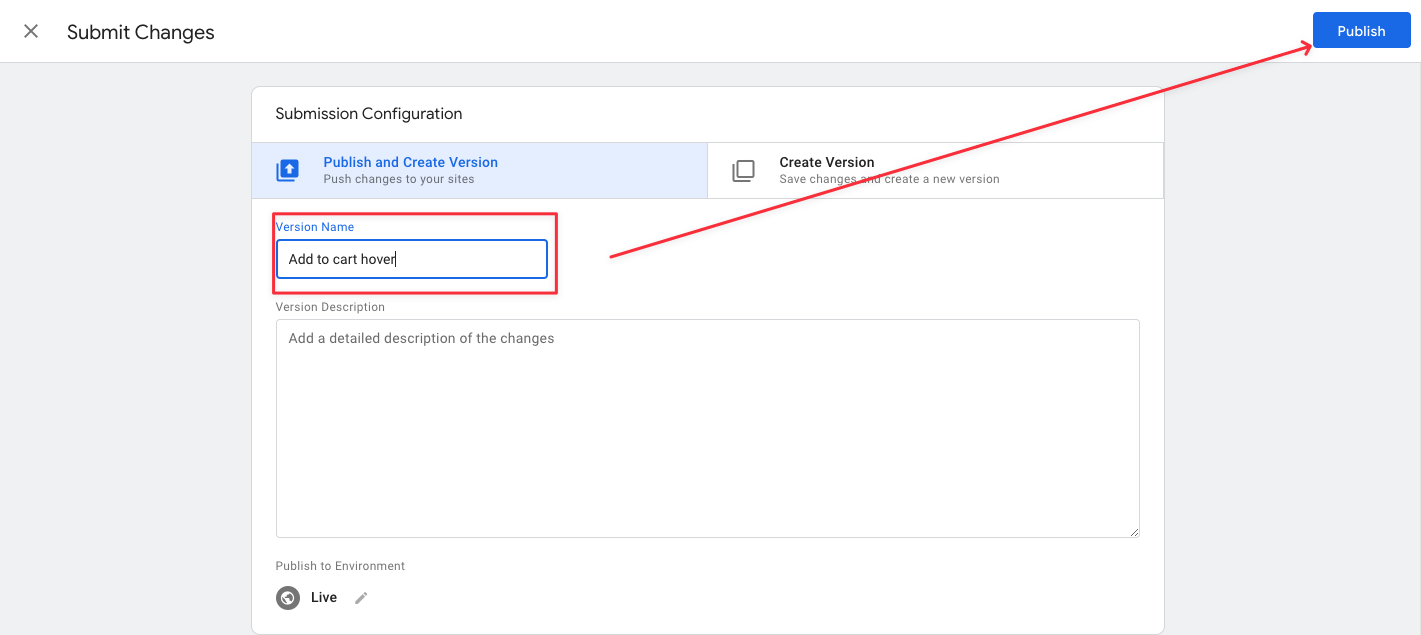
There is one last step left to complete; publishing all the actions we have done. For this, I go back to my GTM panel and click the "Submit" button on the top right.

In the Version Name field, you can make a naming as you wish and say "Publish". After doing this, we can now send the hover data of all users who interacted with our event to our Google Analytics 4 tool.
You can contact me if what we do does not work for you or if there is a part you are stuck with. :)


